Use AirDroid Business to streamline IT resources, reduce cost, and increase efficiency
Use AirDroid Remote Support to provide 1-to-1 remote assistance & troubleshooting for clients, staffs, and business partners
Make AI robots your intelligent business assistant
Explore AirDroid Business Partner Programs to help you grow your business
Sells industry-leading MDM and remote control solutions
Drive more high-value leads for AirDroid Business
Offer AirDroid Business as a subscription service to your customers
Join the distribution program, generate revenue growth
Integrate AirDroid Business to your devices, strengthen products and services
As a device administrator, you may often find yourself needing to track the location of your company's Android devices for security reasons. Manual tracking can be tedious and time-consuming. However, with AirDroid Business's Geofencing Map feature, you can efficiently track multiple Android devices remotely.
In this article, we provide a detailed guide on how to utilize the Geofencing Map feature.
The Geofencing Map feature allows you to monitor the locations and paths of any GPS-enabled device, as well as the convenience of setting up geofences. You will receive notifications when a device enters or exits these geofences. This feature is particularly useful for managing multiple devices in the field.
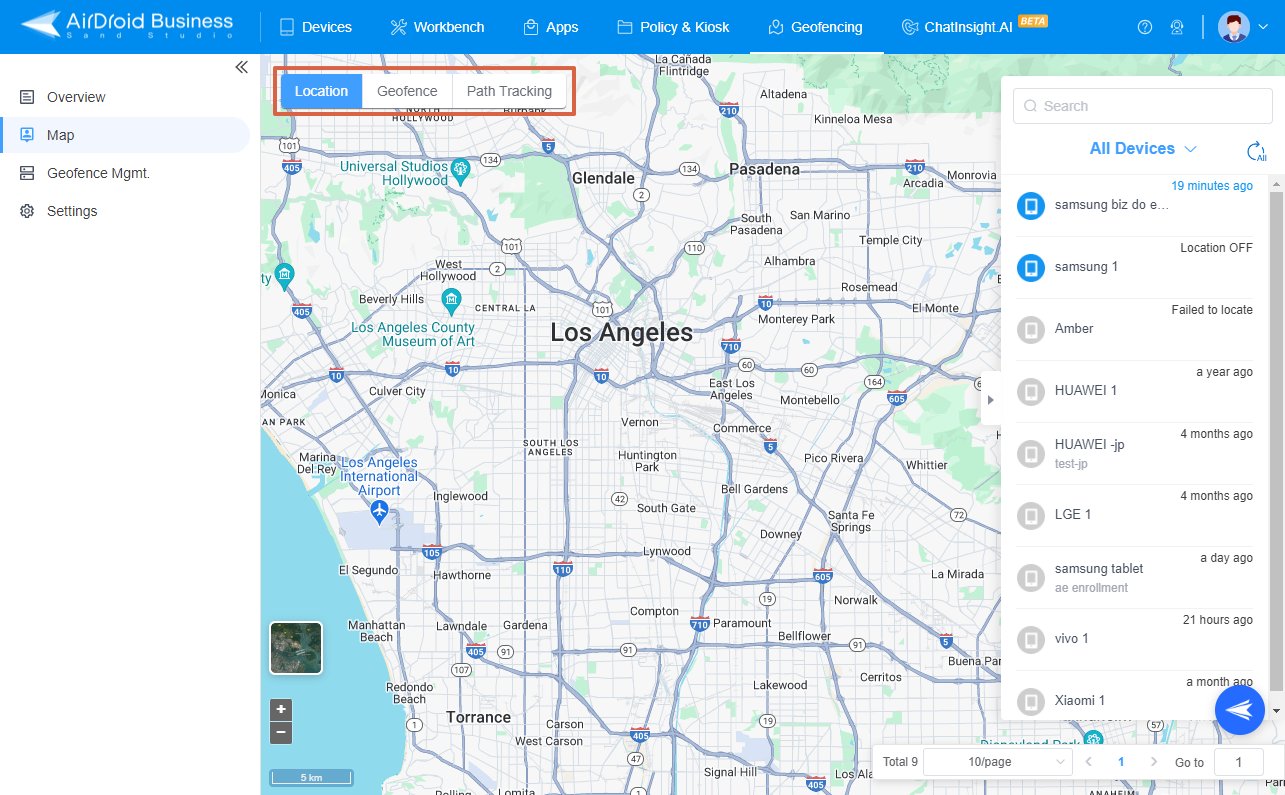
Here's a brief overview of the functions available on the Geofencing Map feature:
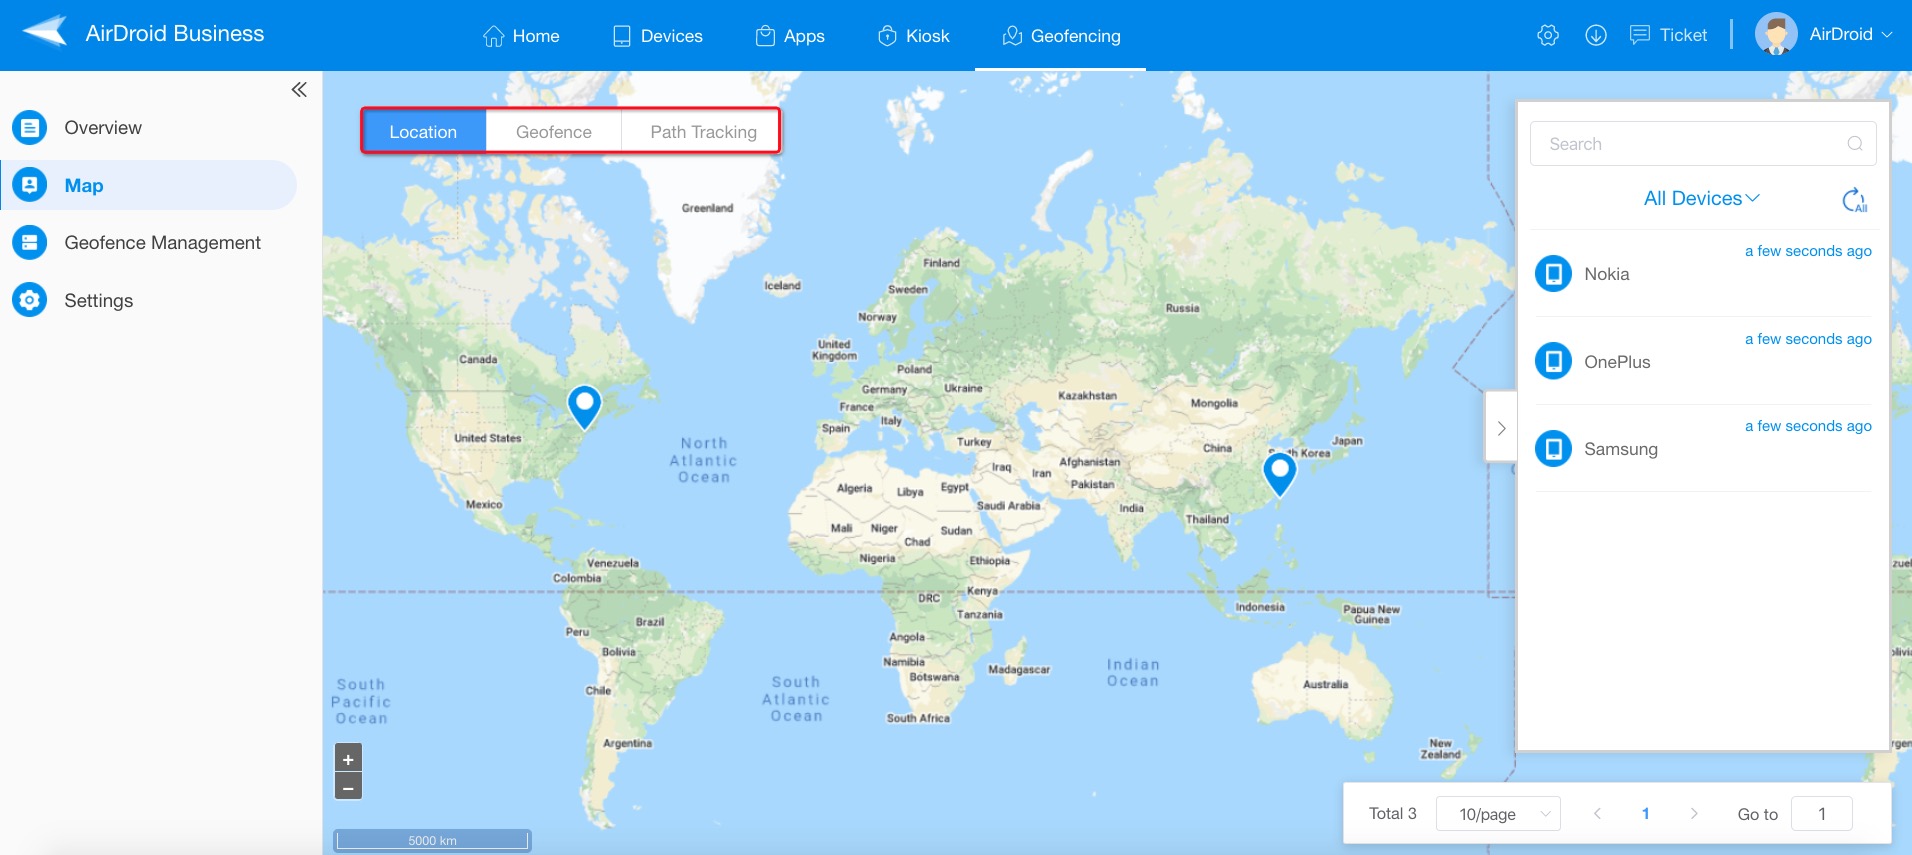
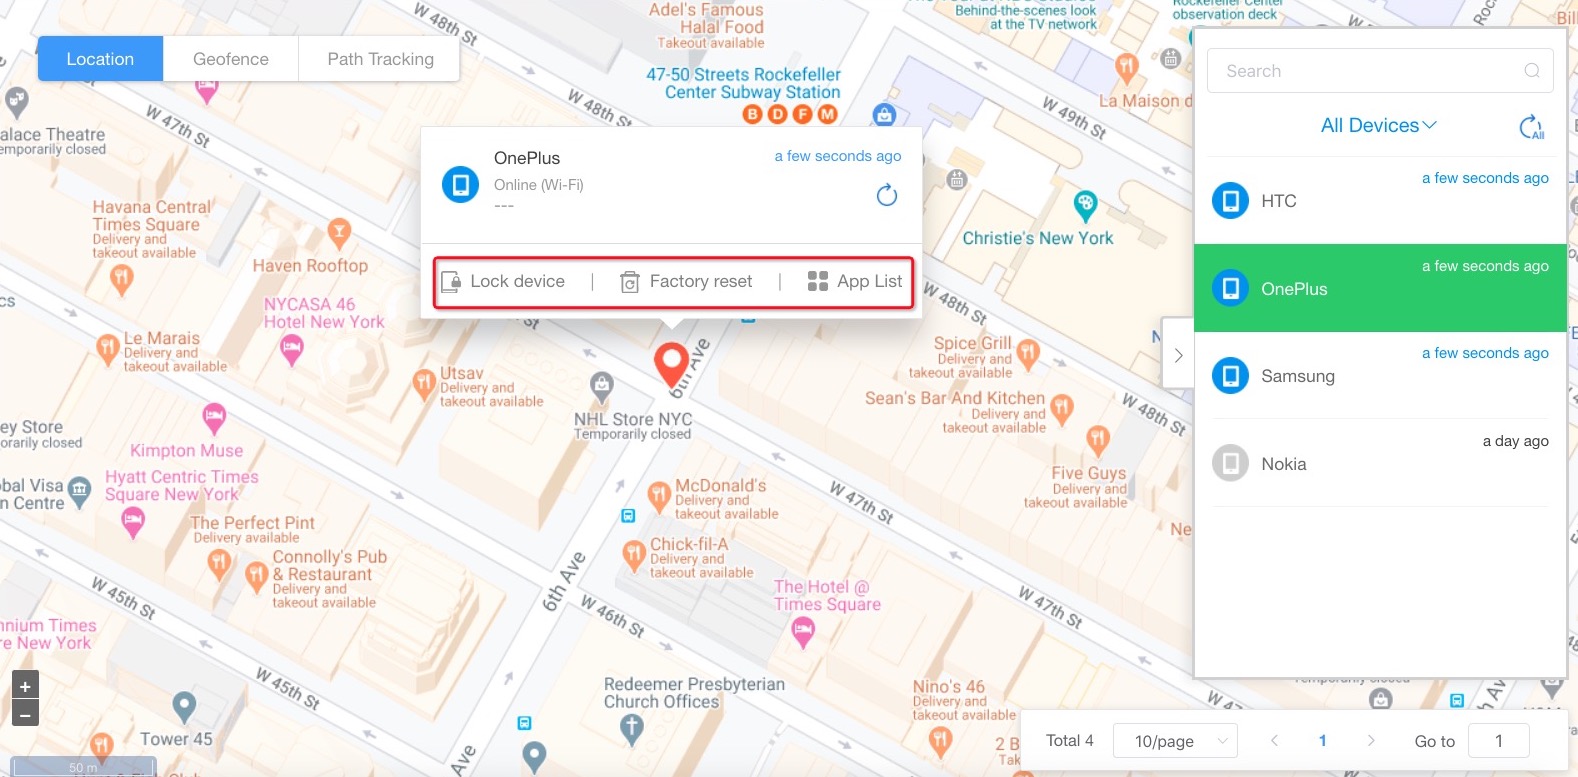
● Location: This tab displays the current location of all your devices, enabling you to quickly identify and address any mislocated devices.
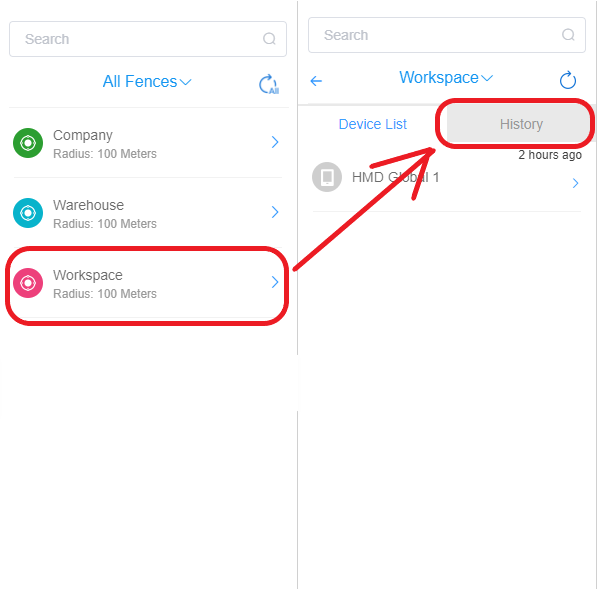
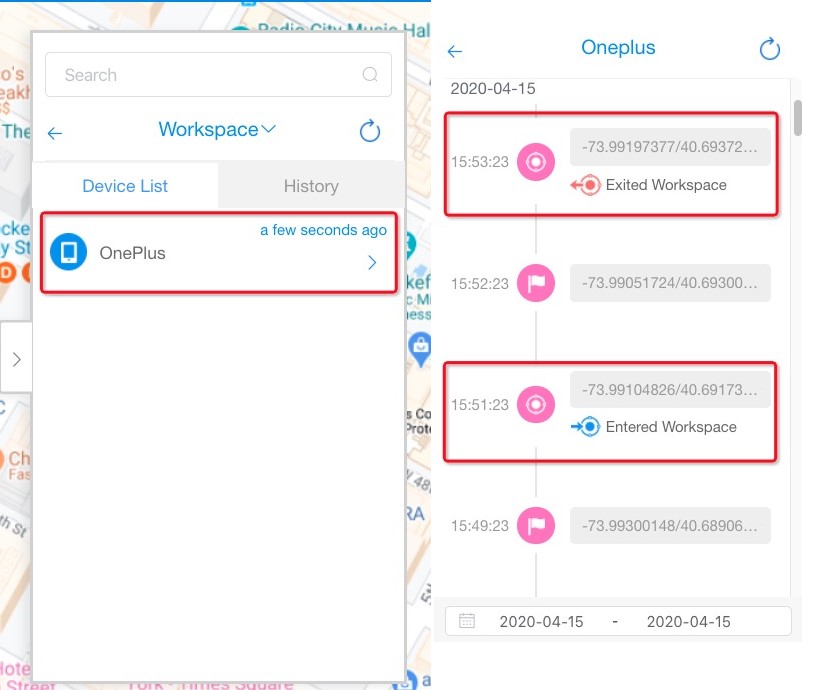
● Geofence:This tab shows all your set geofences. Selecting a geofence allows you to view the Device List and brief activity History for that geofence. For more detailed information, check the Geofence Logs.
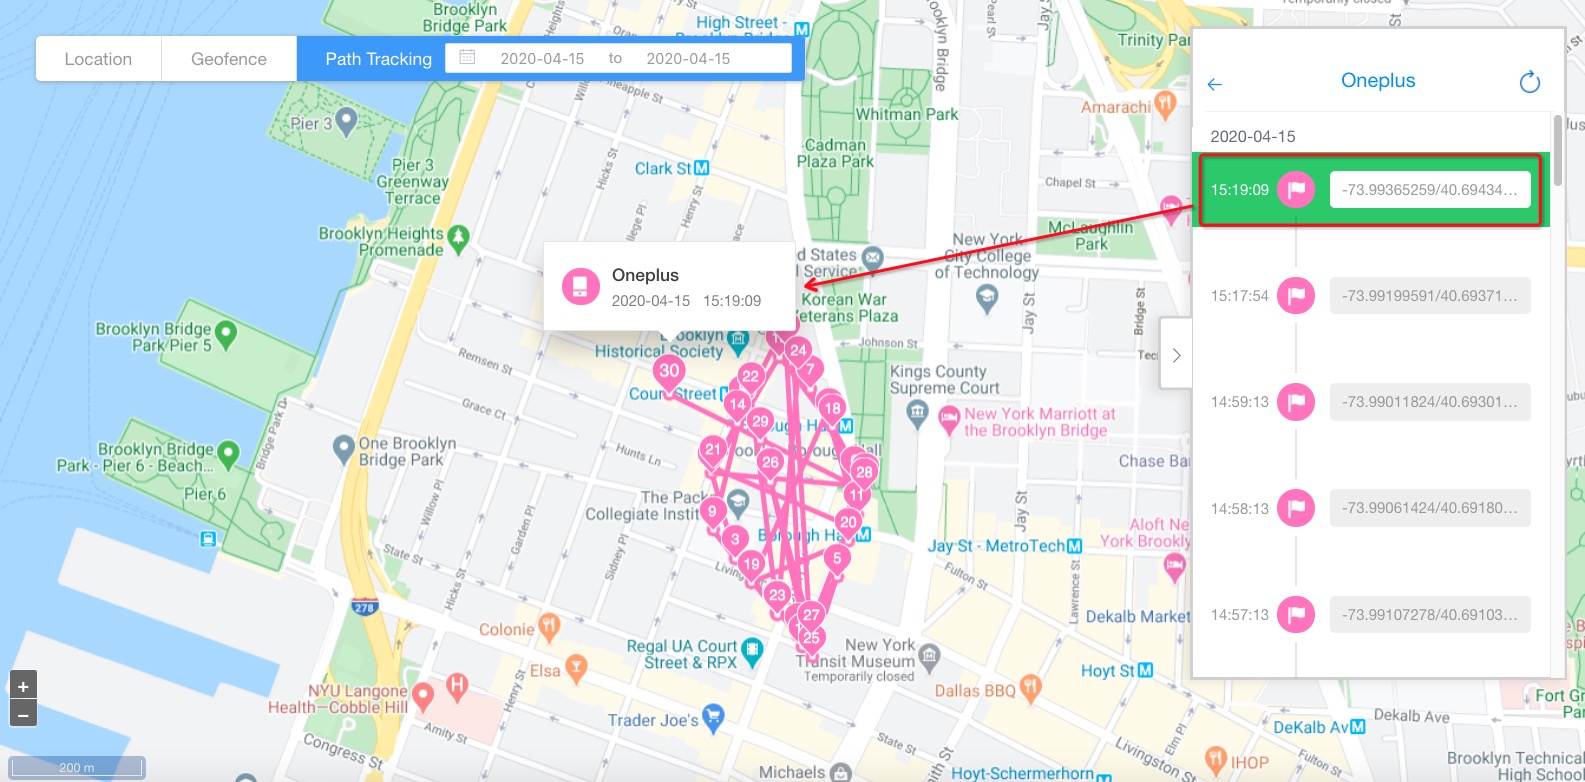
● Path Tracking: This function allows you to track a device's path history. You can scrutinize the path's activity sequence and match it with a specific time point of the device's location.
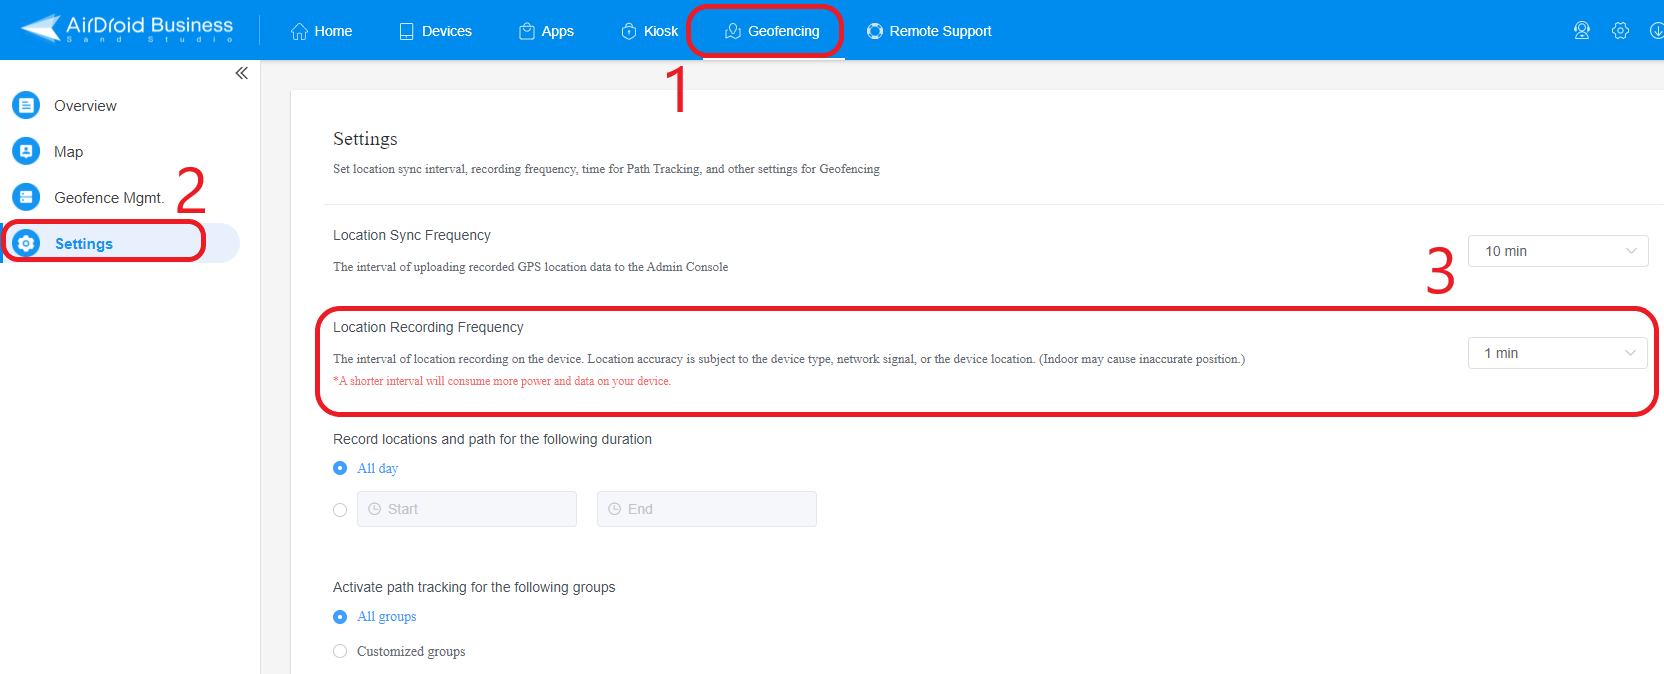
Please follow the steps below for you to fully utilize the Map feature:

![]()
![]()
![]()
By following these steps, you can easily track the location of all your Android devices remotely. This not only saves you time but also ensures the safety of your device.
Still need help? Submit a request >>