How can I Find and Use the Factory Reset Feature on AirDroid Business?
Table of Contents[ShowHide]
In this tutorial, we'll guide you through the process of using the Factory Reset feature in AirDroid Business. Factory Reset, also known as Master Reset, Hard Reset, or Formatting, restores your Android device to its original system state. It's important to note that performing a Factory Reset will delete all data on the device, including files, pictures, account settings, and apps.
- Step 1Locate the Device
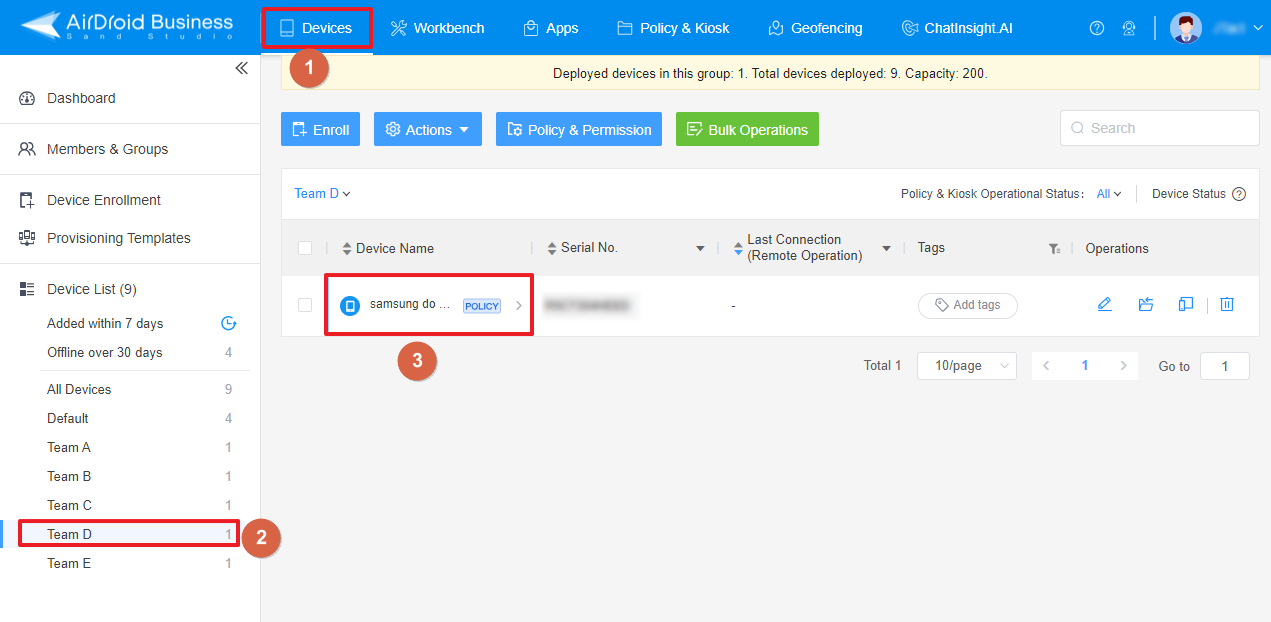
- To begin, navigate to Devices > Device List. Find the group that contains the device you want to reset, and click on the device under Device Name.

- Step 2Initiate Factory Reset
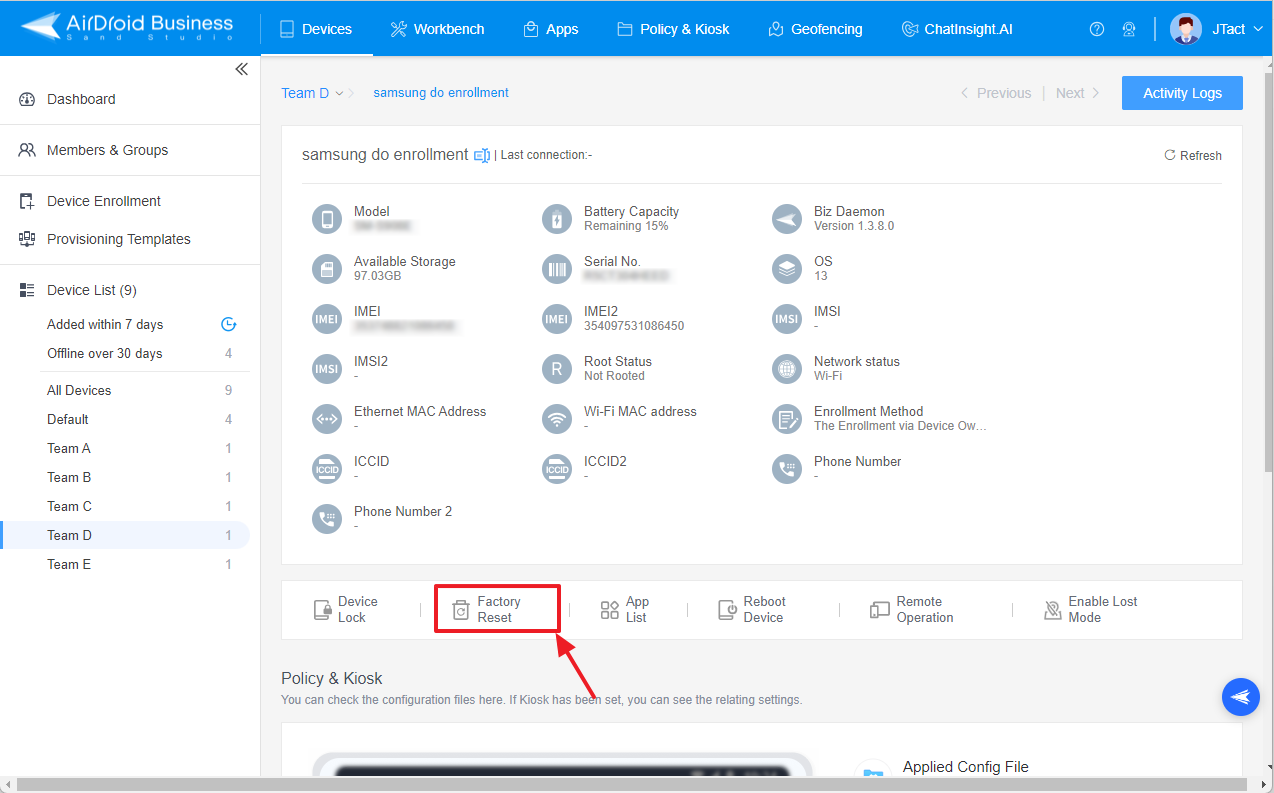
- You'll see the Factory Reset function in the device's options. Click on it to initiate the reset process.

- Step 3Confirm Factory Reset
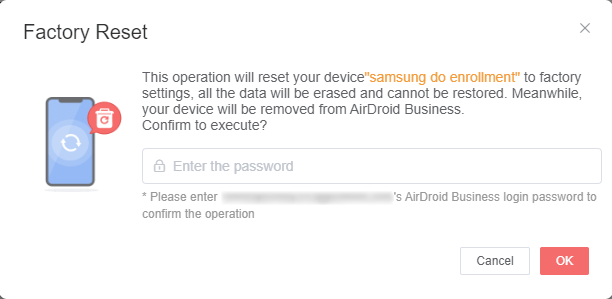
- A pop-up window will appear, asking you to confirm the Factory Reset. Enter the login password you used to log into the Admin Console to confirm, and the Factory Reset process will start.

Note : Before proceeding with a Factory Reset, there are a few important things to keep in mind:
1. This process cannot be undone. Please back up any important information. If you need to transfer information from the device, please refer to our guide on data transfer.
2. Offline devices cannot receive the Factory Reset command.
3. If the Google FRP (Factory Reset Protection) is triggered after the Factory Reset, you'll need to enter the Google account information associated with the device.
4. To avoid triggering Google FRP, remove any Google account and screen lock on the device before performing the Factory Reset.
By following these steps, you can effectively use the Factory Reset feature in AirDroid Business. This can be particularly useful when you need to restore a device to its original state for troubleshooting or before reassigning it to a new user.
Note : You can also set a Policy in AirDroid Business to prevent users from Factory reset the devices without your permission. Click here to learn how to set a Factory Reset Policy.
Was This Page Helpful?
Still need help? Submit a request >>
Related Articles
- How to Create and Manage Device Groups on AirDroid Business?
- How to invite and manage account members on AirDroid Business?
- How to create a custom role on AirDroid Business?
- How to manage the devices in the Device List?
- How to Use “Batch Operations” to Improve Device Management Efficiency?
See all articles
You May Also Like
- What features are available for Remote Access on AirDroid Business?
- How to remote access a device via Admin Console on AirDroid Business?
- How to Manage Devices on AirDroid Business Desktop Client?
- How do I use the View Mode on AirDroid Business?
- How to use Black Screen Mode to maintain the remote device during Remote Control?
See all articles


