How to Use Factory Reset Protection Policy to Secure Your Device?
Device administrators often face the challenge of protecting corporate data on Android devices, especially in the event of theft or loss. When a device is stolen or lost, a factory reset is often the first step that an unauthorized user who obtains possession of the device may take. They may gain access to the device once it restarts, potentially posing a significant risk.
Therefore, IT administrators need to implement a security measure that will protect the devices even after a factory reset, ensuring that only authorized personnel can regain access. This is where AirDroid Business's Factory Reset Protection (FRP) policy becomes essential.
In this article, we will guide you on how to use the Factory Reset Protection (FRP) policy on AirDroid Business to secure your devices.
1What is Factory Reset Protection (FRP)?
Factory Reset Protection (FRP) is a security feature on Android devices designed to prevent unauthorized users from resetting the device without the administrator's permission. It plays a crucial role in enterprise management by providing additional security protection for company devices.
If you enable FRP and associate a specific Google account email with the device, the device will require logging in with that specific Google account email after a factory reset to be usable again, which can safeguard the devices from misuse.
2Steps to Set up Factory Reset Protection Policy
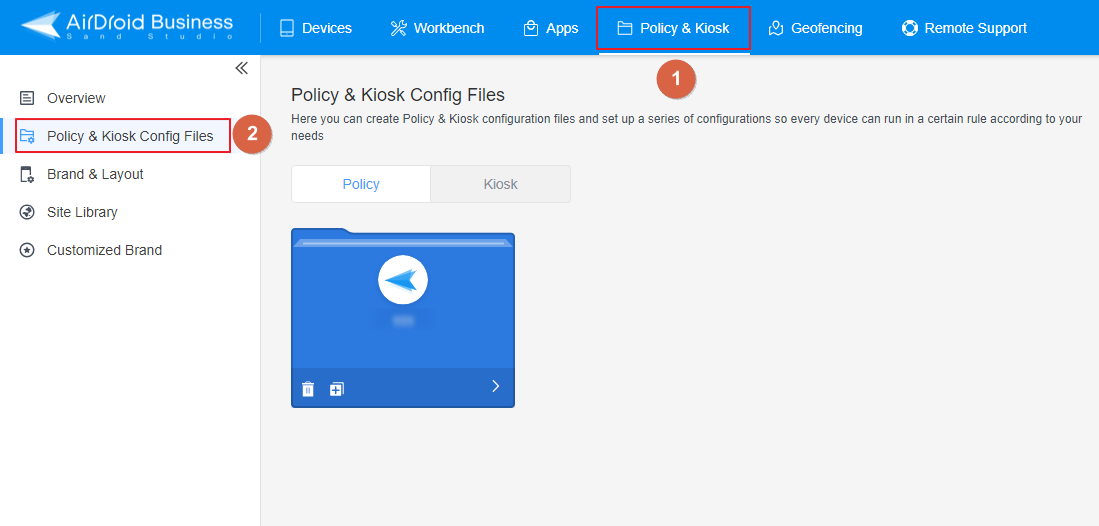
- Step 1Access Policy Setting
- Log into Admin Console, navigate to the "Policy & Kiosk" Section on the dashboard, and click "Policy & Kiosk Config Files".
- Step 2Create or Edit a Policy
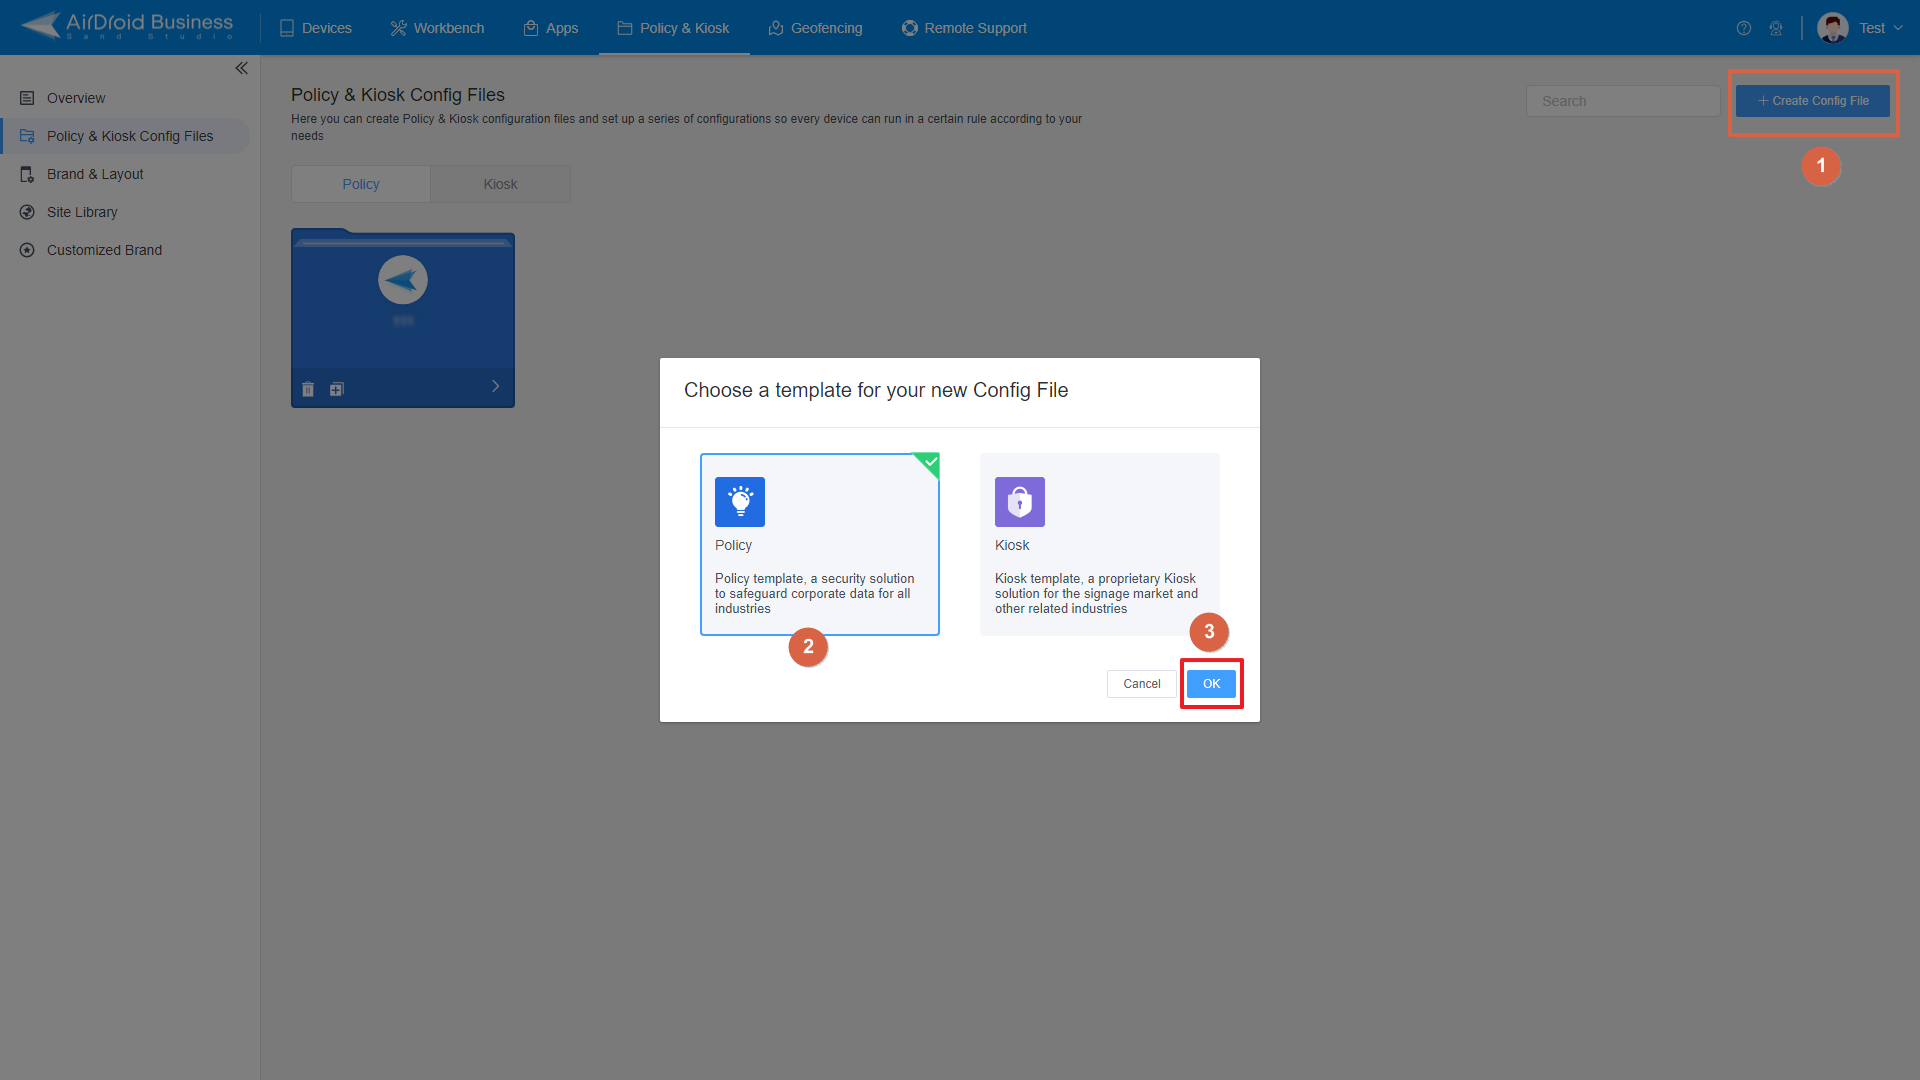
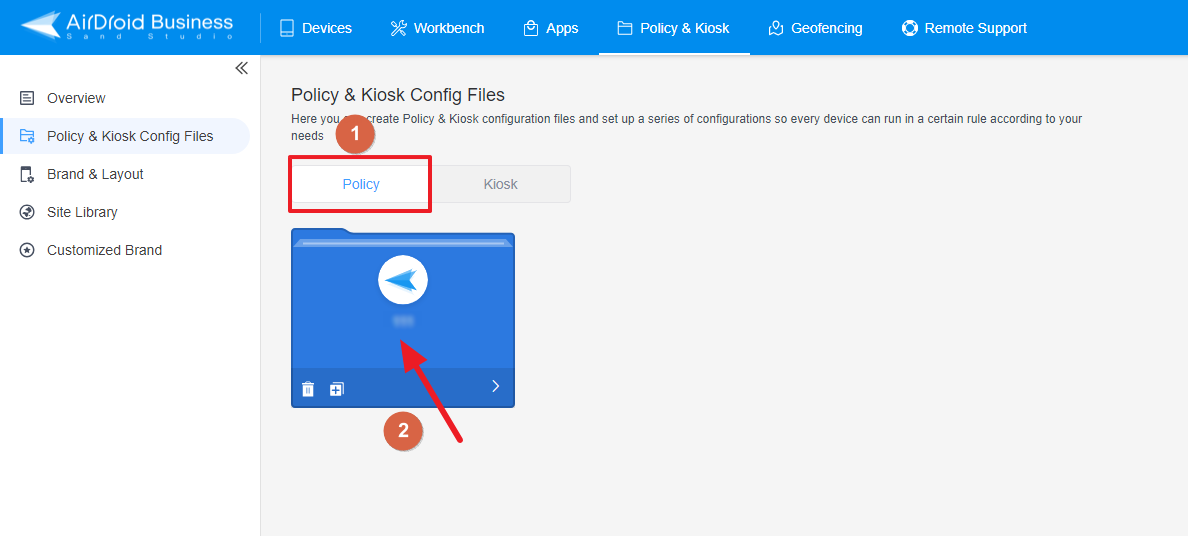
- In this section, you have the option to either create a new policy or modify an existing one.
- ● To create a new policy, click on "+Create Config File", choose "Policy" and then click "OK" on the pop-up.
- ● To modify an existing Policy, switch to the "Policy" tab, select the Policy File you want to modify.
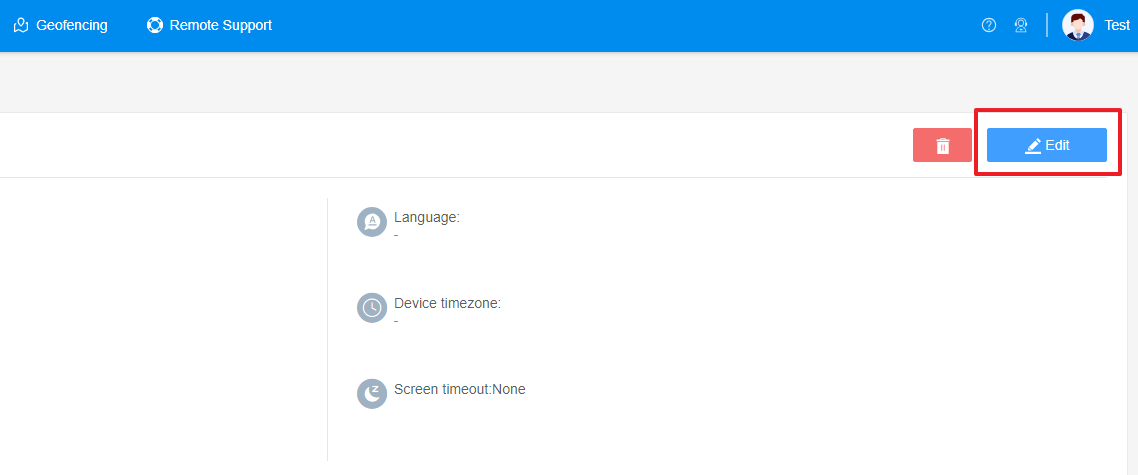
- Click on the "Edit" Button in the top right corner. On the following page, you can set all kinds of limitations and settings for your config file.
- Step 3Access the "Factory Reset Protection Policy" Section
- Click on [Restrictions], and find the "Safety" section. Here, you can configure the "Factory Reset Protection" Policy.
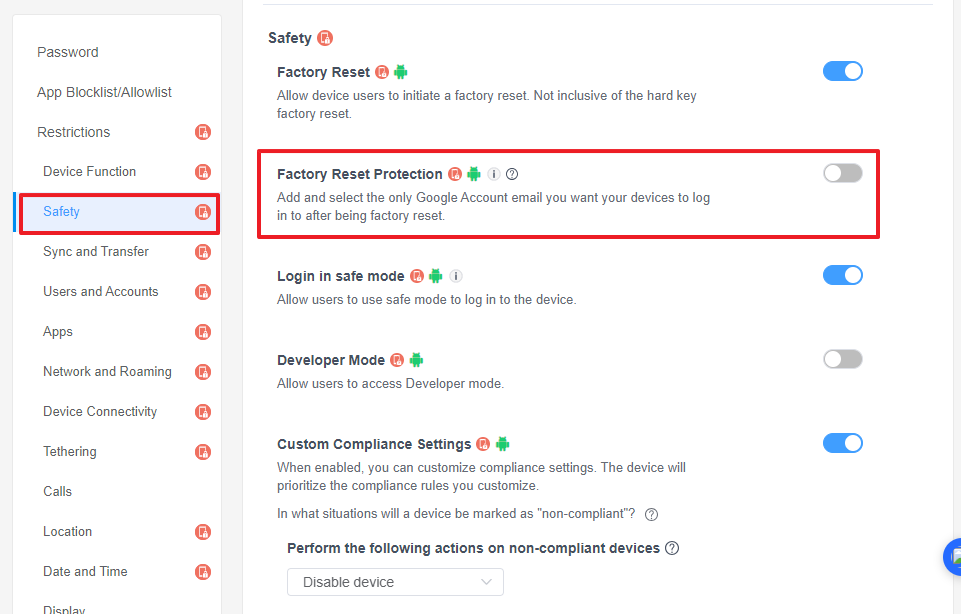
- Step 4Set up the Factory Reset Protection Policy
- To enable FRP, please turn on the switch. You can see the Email list configuration appear below.
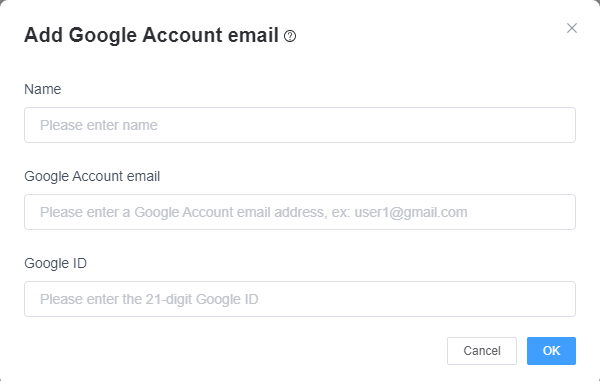
- 1. Click the [Add Email] button and provide the following information in the pop-up window to add the only Google Account email you want your devices to log in to after being factory reset.
- ● Name: Assign a name to the Google account email for factory reset protection.
- ● Google Account Email: Enter the email address of the Google account you want to use for factory reset protection.
- ● Google Account ID: Input the Google Account ID corresponding to the Google account email for factory reset protection.
- You can click here to obtain the Google Account ID by logging in with the intended Google account email address.
- 2. After entering the required details, click on "OK".
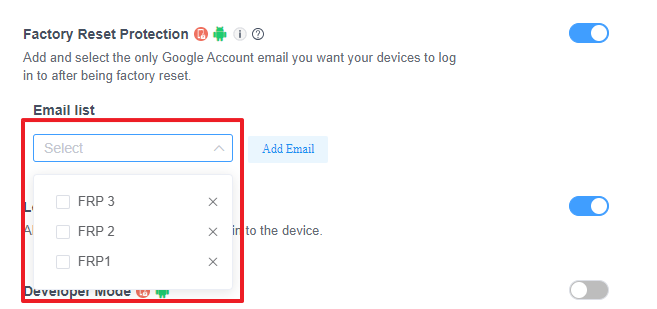
- And you have successfully added a Google account email. You can add multiple emails according to your business needs.
- Select the Google Account Email by clicking the drop-down box.
- Step 5Save and Apply the Policy
- After setting up the this Policy, click "Save" button on the top right corner.
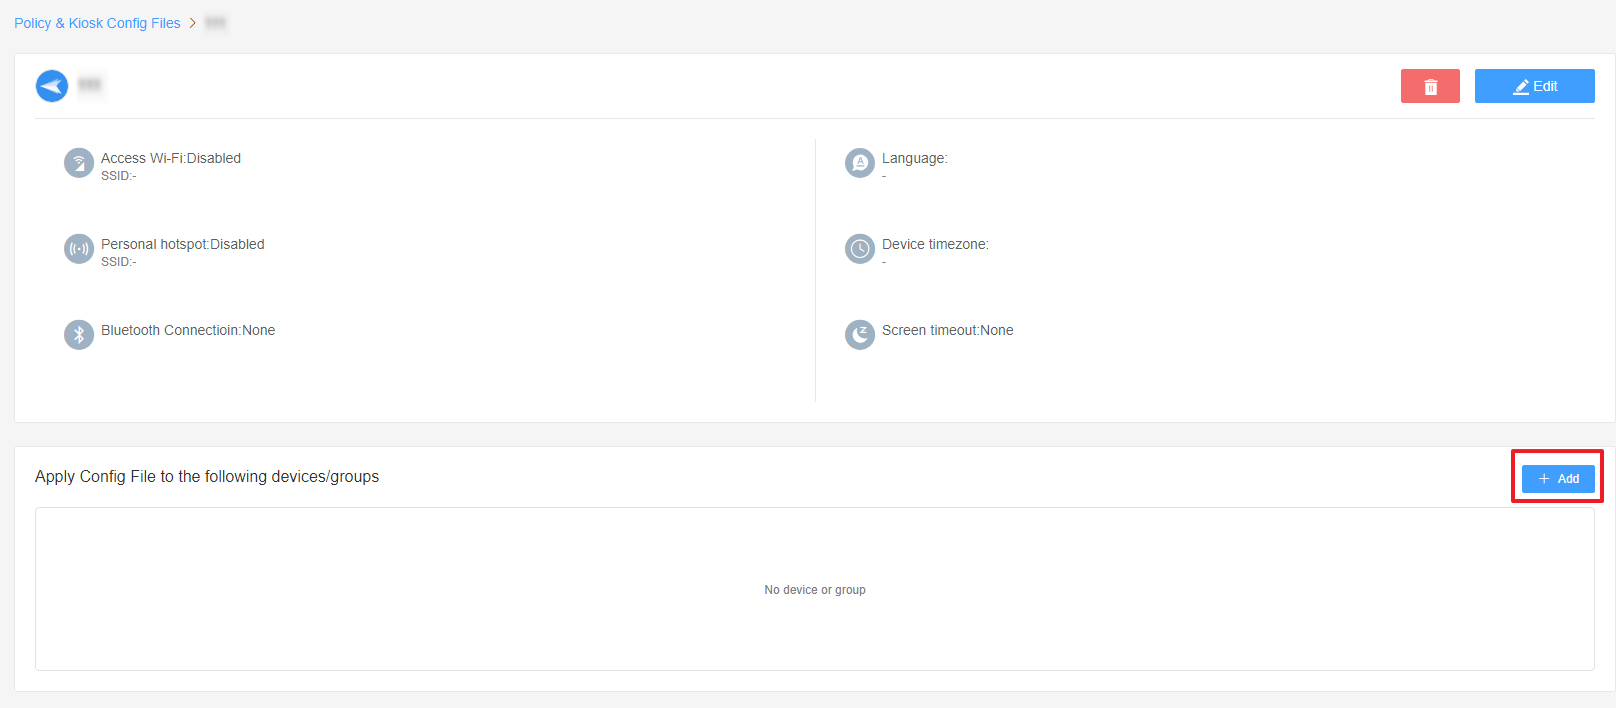
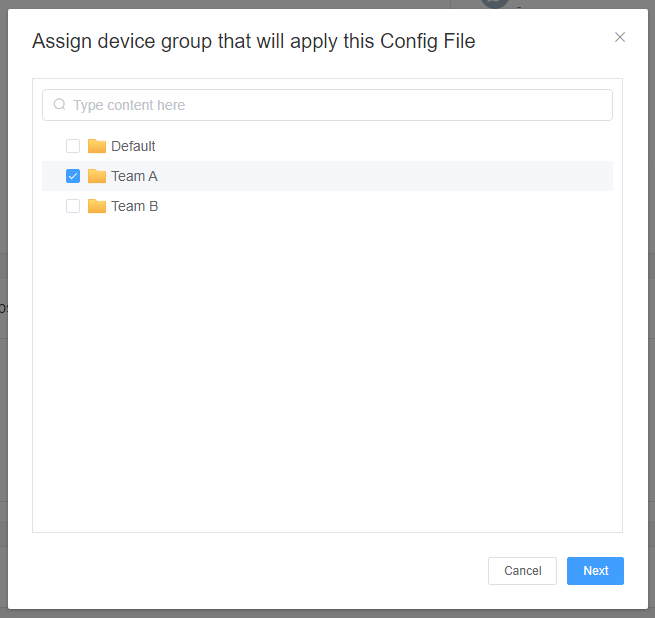
- Then, return to the Policy Management section, select the policy you created or edited, find the [Apply Config File to the following devices/groups] and click [+Add]. Choose the devices or groups you want to apply the policy to and confirm.
- When the status in the list turns to "Applied successfully", the policy settings have been successfully applied to the target devices.

Support devices with Android 11 and above.
Devices enrolled through Android Enterprise or Zero Touch are not supported.


By following these steps, you can effectively manage the Factory Reset Protection Policy for your devices using AirDroid Business.
Still need help? Submit a request >>
Related Articles
- How to implement App Blocklist/ App Allowlist on AirDroid Business?
- How can I control camera access using Camera and Lockscreen Camera Settings in AirDroid Business?
- How can I set up password rules with Android Password Policy in AirDroid Business?
- How do I manage Microphone Permissions in AirDroid Business?
- How can I ensure data security with Mandatory Storage Encryption in AirDroid Business?
You May Also Like
- How to use App Allowlist for Kiosk Mode in AirDroid Business?
- How to Set up Kiosk Website Allowlist on AirDroid Business?
- How to set up Kiosk Browser Settings on AirDroid Business?
- How do I Customize the Kiosk Brand within AirDroid Business?
- How to Modify My Brand and Layout in Kiosk Mode of AirDroid Business?

