How do I Customize the Kiosk Brand within AirDroid Business?
Establishing a consistent brand identity across multiple devices can enhance the user experience and increase brand recognition. With AirDroid Business, you can customize the Kiosk Brand to achieve this.
In this article, we will guide you through the steps to customize the Kiosk Brand on AirDroid Business.
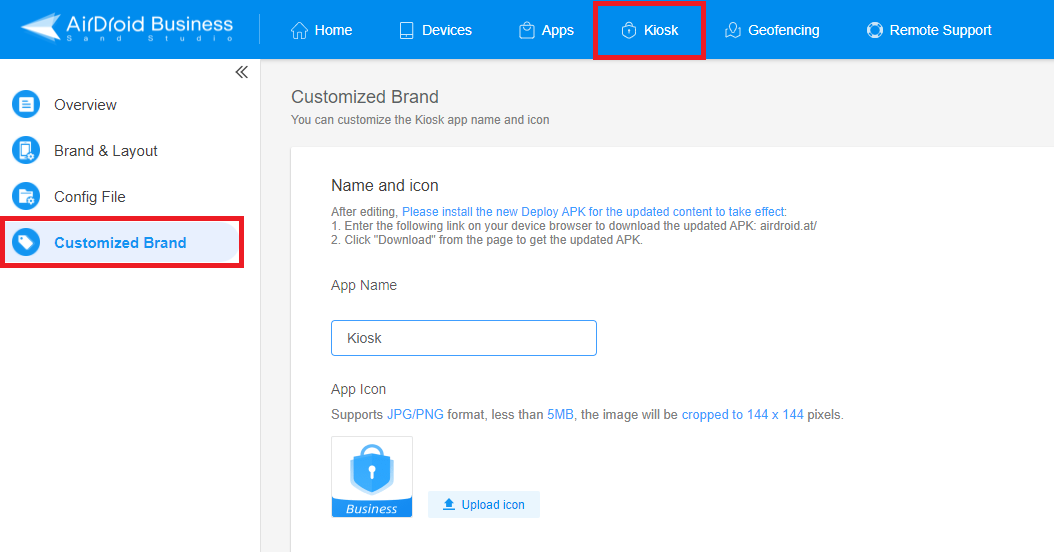
- Step 1Access Kiosk Customized Brand Settings
- go to Admin Console > Select > Kiosk > Customized Brand

- Step 2Edit Kiosk App Name and Icon
- Here, you can edit your Kiosk App name and upload a customized icon.
Then, click "Download" from the page to get the updated APK.

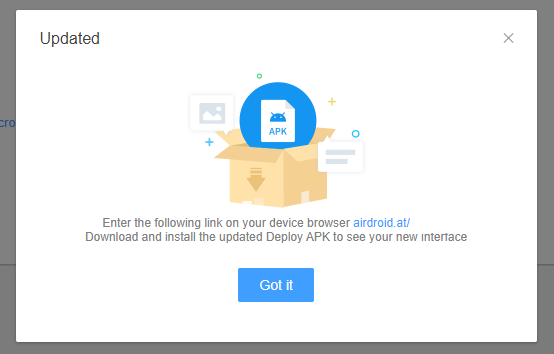
- Step 3Download and Install Updated APK
- A window will appear with directions to download the updated APK. Download it on your remote device and install it.
- There are two methods.
- ● You can access the download link by opening the browser on your remote device and navigating to http://airdroid.at/(six-digit numbers), as shown in the window.
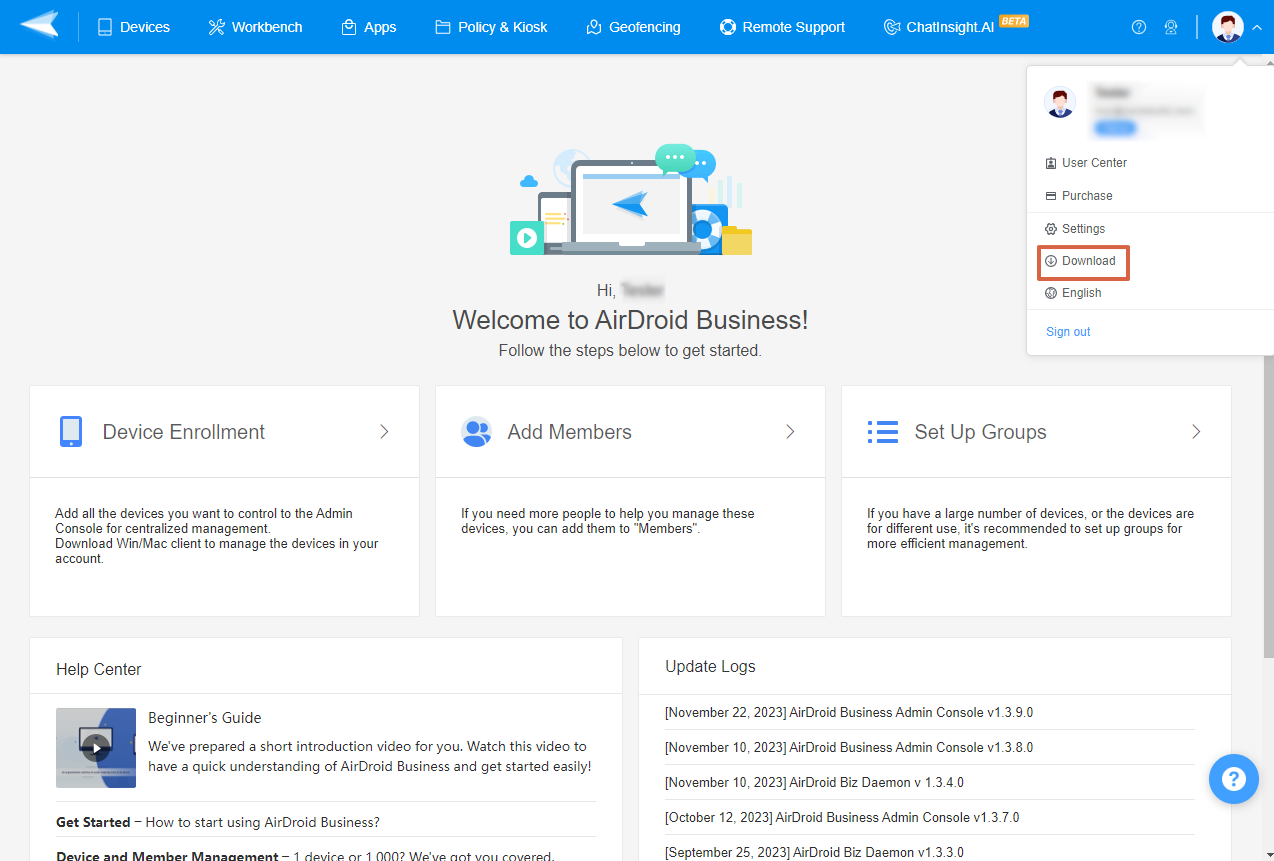
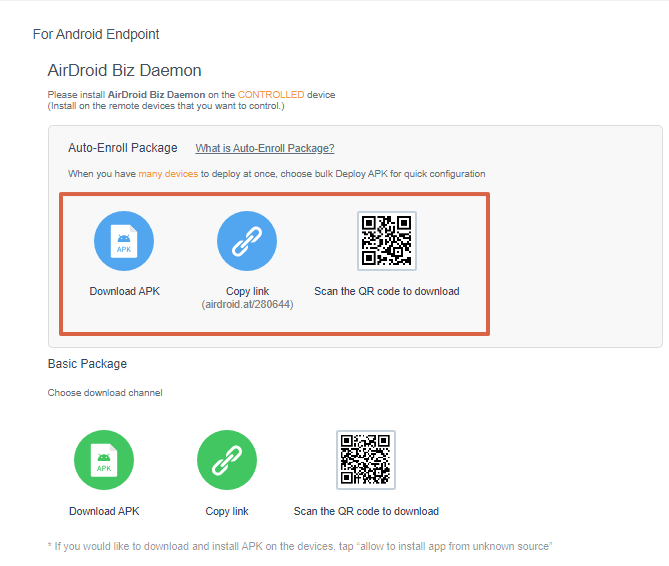
- ● You can also click the Download icon of your Admin Console, download and install the bulk-deploy APK to your device, and your device will be bound with your AirDroid Business account.


Once you have downloaded and installed the new APK on your remote device, the Kiosk App should reflect the customized changes.
Customizing the Kiosk Brand on AirDroid Business is a simple process that can significantly enhance your brand identity and user experience. By following the steps outlined in this tutorial, you can ensure a consistent and recognizable brand presence across all your managed Android devices. Remember, a strong and consistent brand identity is key to building trust and recognition among your users.
Still need help? Submit a request >>
Related Articles
- How to use App Allowlist for Kiosk Mode in AirDroid Business?
- How to Set up Kiosk Website Allowlist on AirDroid Business?
- How to set up Kiosk Browser Settings on AirDroid Business?
- How to Modify My Brand and Layout in Kiosk Mode of AirDroid Business?
- How to use Kiosk Launcher for AirDroid Business?

