How to Make a Business Card in Photoshop
Since we work with business cards so often, they’re often drowned out in a Rolodex or shoved into a drawer, never to be seen again. The only way to stop that from happening is to create your business card to make it memorable.
So today, we’re featuring a step-by-step guide on how to make a business card in Photoshop, one of the premier graphic design and photo editing tools on the market. Let’s get straight into it!
Key Takeaways:
- Less is More. Don’t keep things too messy. You don’t want to overpower the main purpose of the business card which is to give people relevant information to reach you.
- Pick a right background color. Choose the color (background or text color) you feel most appropriately resonates with your brand to ensure consistent messaging.
- Leverage templates. You can also try a business card template online to edit it in Photoshop as long as it's the .PSD format. This is pretty easy so we won't cover it here.
1. How to Create a Business Card in Photoshop
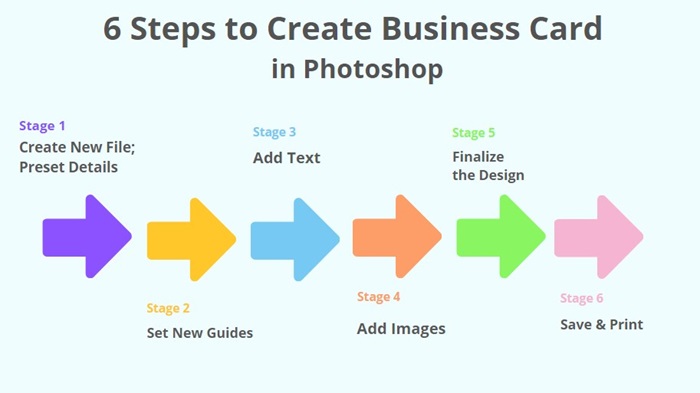
Adobe Photoshop is a powerful design tool because of its versatile functionality, creative freedom, and high-quality output. And that’s why Photoshop has been considered as a professional method to design business cards.
Even though Photoshop requires a monthly/yearly subscription, there is a 7-day free trial available, so it’s pretty accessible to create a business card in Photoshop.
Note: I’m using the Photoshop CS6 on my Windows 11 computer, so the specific steps or buttons may be slightly different.
1.1 Create a New File & Preset Details
In the beginning, you should create a new file and preset details for your business card.
Step 1. Open Photoshop and click on File > New.
Step 2. You’ll then be met with a ‘New Document’ window, then you can enter the preset details. These are the standard presets for general business cards:
- Width and height: 3.5 inches x 2 inches ( I will normally use 3.75 inches x 2.25 inches)
- Resolution: 300 PPI
- Color mode: CMYK, 8 bit or 16 bit.
(Printers typically use CMYK so change the Color Mode to ensure that your business cards' colors come out the way you design them.)
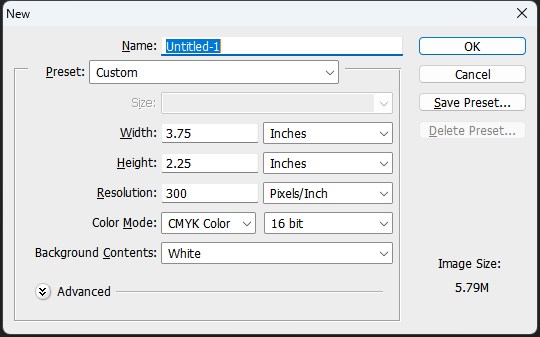
This is just an example for the standard of a business card, and you can also change the preset details if you want.
Step 3. When you’re done with selecting your business card preset, click on OK.
1.2 Set Guides
Step 1. Click View > New Guide.
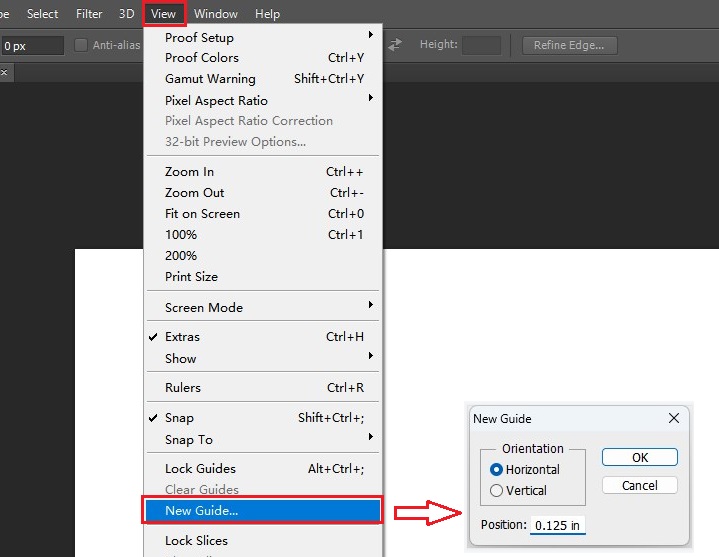
Step 2. Set 4 new guides for your design. This is optional but recommended, especially if you are a fresh user of Photoshop.
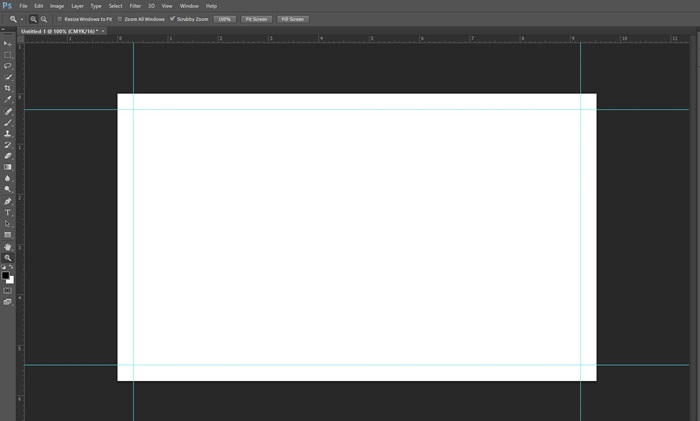
Below are my examples for the 4 guides based on the size of 3.75 in x 2.25 in:
- 1st guide: Horizontal=0.125 in
- 2nd guide: Vertical=0.125 in
- 3rd guide: Vertical=3.625 in
- 4th Guide: Horizontal=2.125 in
This will set a safe area to ensure that your text is not cut off when you trim the business card.
1.3 Add Contact Text
Once you’ve decided on a design that best matches your brand identity, it’s time to add your relevant contact information.
Step 1. Click the T symbol on the left menu.
Step 2. Click the empty area where you want to add the text to.
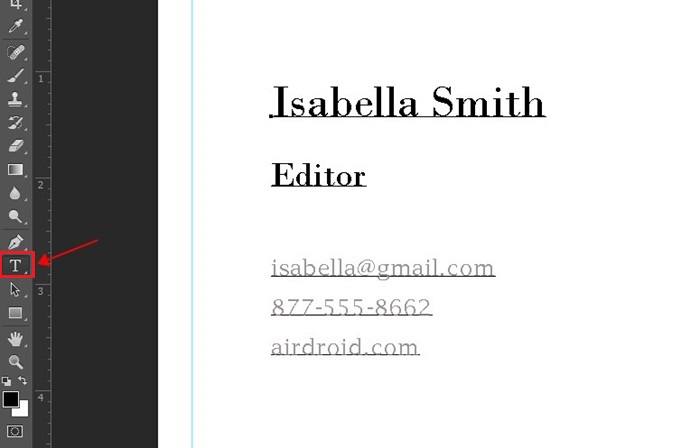
Therefore, you can type your name, your company name, job title, email address, phone number, and any other information you want.
You can also change the text font, test size, text color, boldness, and more using the text tool.
Recommendations:
a. Your contact details and information are the star of the show here, so you’ll want to ensure it stands out the most. So, select a font that’s professional, easy to read, and relates to your brand’s guidelines.
For example, your name and designation should stand out, so you can try making it bigger or have a separate section to highlight it.
b. Align each of the text boxes so that it looks neat, legible, and has a ‘balance’ to the layout.
1.4 Incorporate Images, Logos, or Graphics
Step 1. Click File > Place... (or Place Embedded/Linked).
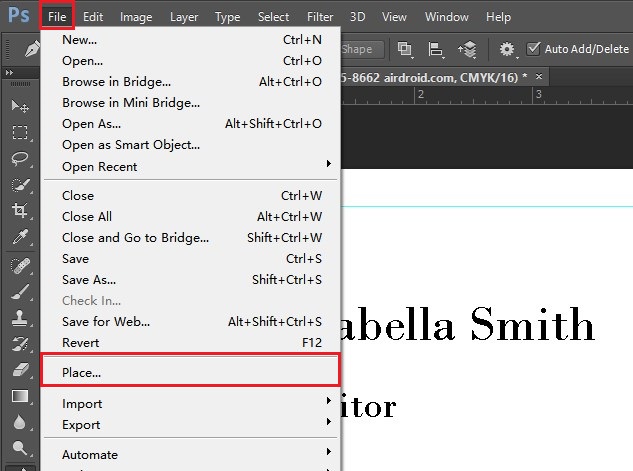
Step 2. Choose the image to upload, and then adjust the image position on your business card.
Recommendations:
a. It’s okay if you add the text only, but it’s not making your business card standout. So it’s always recommended to add graphics and images on your business card, such as the company logo.
b. Make sure that the image/file you’re adding to your business card design is high resolution. Placing lower-res files like JPEGs will result in a grainy, pixelated logo which doesn’t look great on a business card.
c. You can also add a QR code if you have, such as the LinkedIn QR code or Instagram QR code to connect on social media.
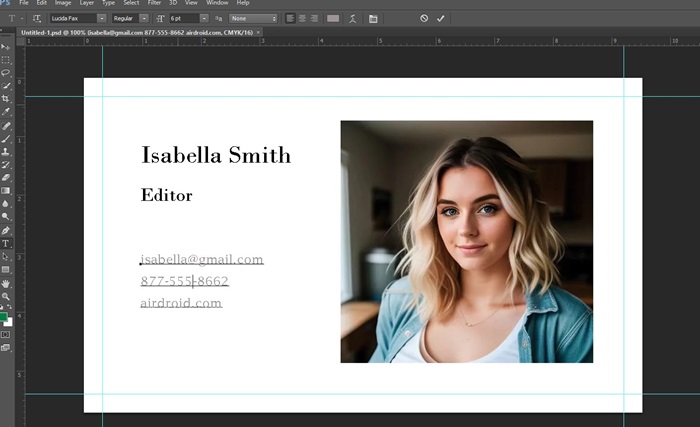
1.5 Finalize the Business Card Design
Step 1. Now, proofread and make some finishing touches to your business card design. Check the information you entered to make sure there are no typos and mistakes.
Step 2. You can also change the design’s color balance, contrast, and saturation to enhance the design of your business card.
Step 3. Zoom in and out the business card to the general size of the physical business card, so that you can double check to make sure it’s easy to read after printing.
1.6 Save and Print Business Card
Step 1. Go to File > Save as to save your business card. Make sure to set it to PSD format.
Step 2. Go to File > Print to print your business card.
Recommendations:
For large-scale printing, we’d recommend going to a printing service or shop. They’ll know exactly what to do and how best to get your business card out. Ask them for any specifications on what type of file they require to print a high-resolution version of your business card.
2. Smarter Way to Create a Business Card with AI
Creating a business card with Photoshop can be time-taking and difficult for tech newbies. There is a smarter way to create a business card easier and faster. ChatInsight AI Business Cards offers a robust AI business card builder that lets you build and tailor-make powerful and versatile AI chatbots!
Key Features:
- A Memorable First Impression
- Online Share Methods: URL, QR code, or iFrame code.
- Update Your Information in Real Time
- Analytics and Metrics Tracking
How to use ChatInsight to Create an AI business card:
Step 1. Sign into your ChatInsight dashboard here.
Step 2. Click 'New Bot' on the upper right.
Step 3. Click 'AI Business Card'.
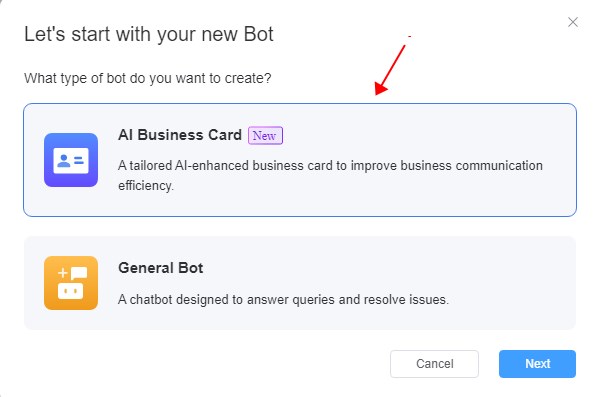
Step 4. Follow the on-screen wizard to enter your basic information, any additional information about yourself, your company, and your product/service.
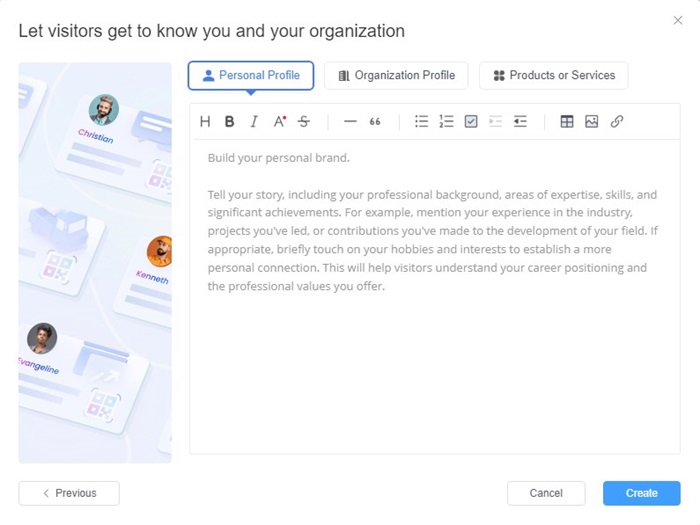
Step 5. Then click 'Create'. Then your AI business card has been made.
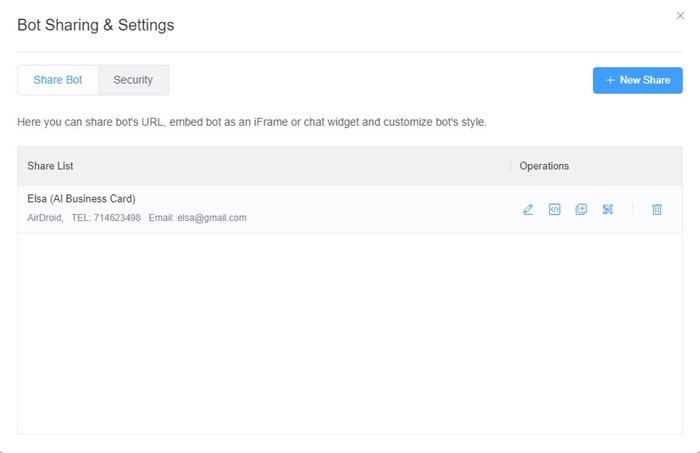
To share your business card, click 'Bots' on the left, and click the 'Share' button on your business card bot. You can share it however you want.
3. FAQs
4. Final Words
And that’s how to make your own business card in Photoshop! We hope you’ve now got a better idea of what to expect when designing a business card but it can be tough, especially if it's your first time using graphic design software.
In that case, we’d recommend checking online to find templates and premade business cards for you to try and mess around with to get familiar. You can always make a new business card, so don’t worry too much about having multiple versions!
And if you’re looking to leave a lasting impression, ChatInsight’s AI business cards are a solid way to streamline communication with your clients and potential partners while having a personal AI assistant in your pocket!





Leave a Reply.