5 Quick Ways for How to Transfer Photos from Android to Computer
We all come across times when you need to transfer photos from your Android phone to a computer. Maybe you want to edit them via professional software or back them up, or at times, you want to move photos in case of switching to a new smartphone.
Regardless of the reason, knowing how to transfer photos from Android to the computer is important. That's why we have outlined a few proven ways to help you transfer pictures from Android to PC effortlessly.
And yes, you don't need to be a tech geek to implement these methods.
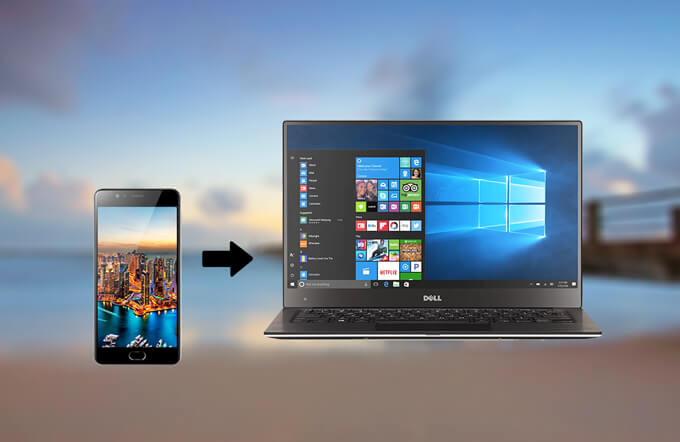
Check out some simple solutions on how to transfer photos from Android to computer without losing the original quality.
Part 1: Transfer Pictures from Phone to Computer with USB
Probably the easiest and most commonly used method to send photos from your Android phone to a computer. All you need is a USB cable to connect both devices, and then send as many photos as you want.
The biggest advantage of using a USB connection is consistent and secure data transfer. But note that, it often takes more time to send data via a USB cable. Plus, this method is useless if your computer's USB ports are damaged or malfunctioning.
In any case, here's how to transfer pictures from phone to computer with USB:
Step 1.
Use an original USB cable to connect your Android phone to the PC.
Step 2.
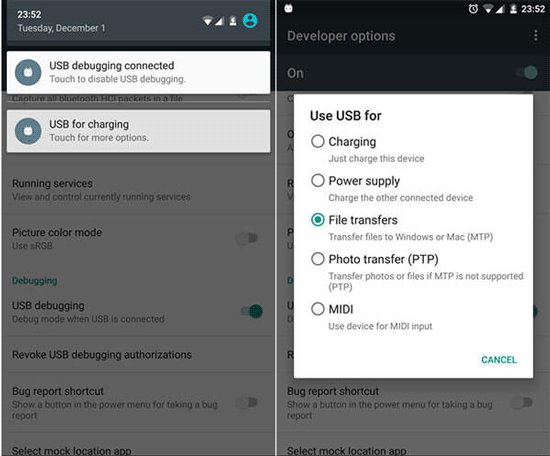
On your phone's notification shade, tap the USB notification and select "File transfers."
Step 3.
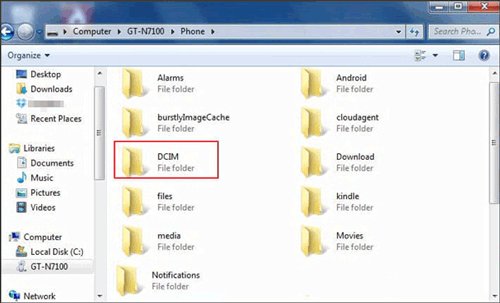
Now, click on your Device's name disk on your computer to go into the internal storage. Here, open the DCIM folder.
Step 4.
Select and transfer the intended photos to anywhere on your PC.
Part 2: Other Ways to Transfer Photos from Phone to Computer
1Using a Built-in Microsoft Photos App
Windows 10 has a built-in native app, namely, "Photos" that offers a quick way to transfer your photos to PC. This method is particularly useful if you have a huge stock of photos to be moved from phone to computer.
Check out the below steps to
Step 1.
Connect your phone to your PC with a USB cable.
Step 2.
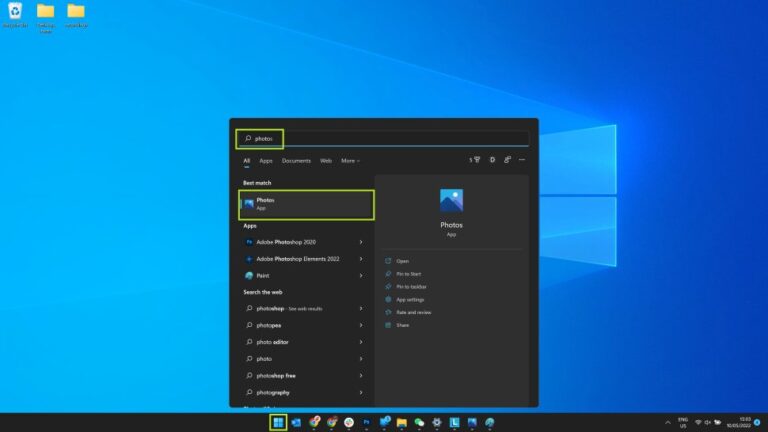
Once it's connected, go to Start and open the Photos app.
Step 3.
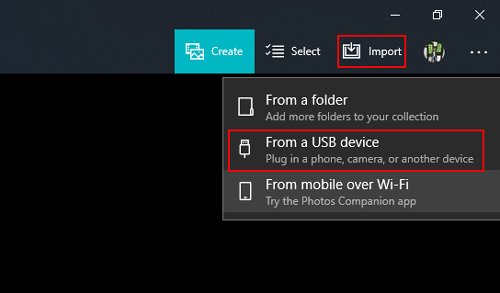
Now, click on the Import icon on the top-right and then, click "From a connected device" or "From a USB device."
Step 4.
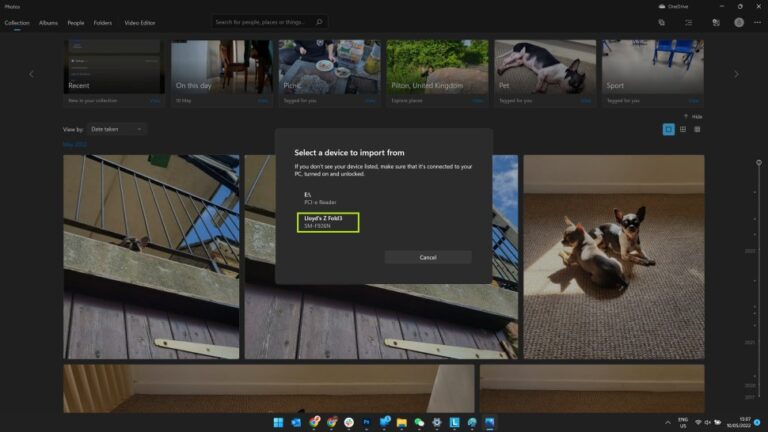
Select your device name and the app will start scanning for photos - and videos.
Step 5.
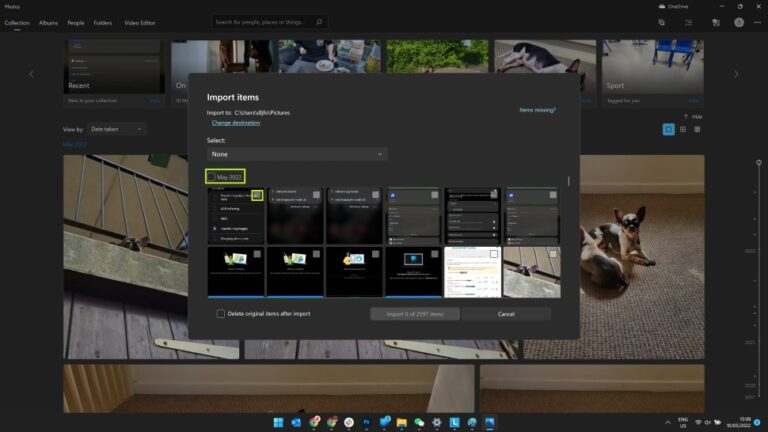
Once scanned, you'll see all the photos and videos in the app. Select individual photos and hit "Select All" to proceed.
Step 6.
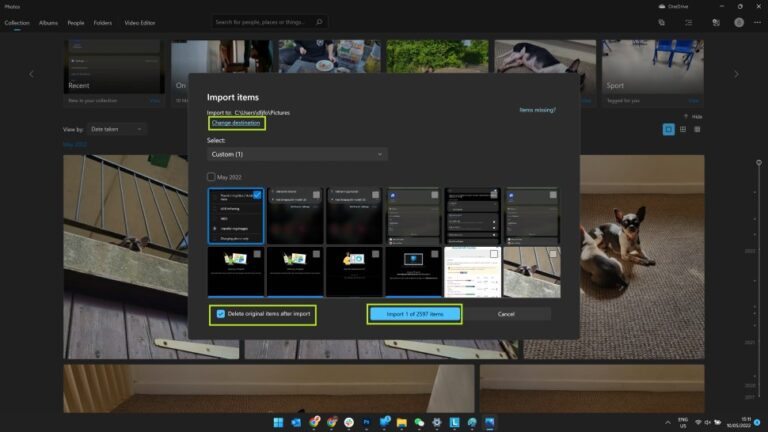
Finally, click on "Change destination" to select a location on your PC and hit Import to begin transferring.
2Transfer Photos from Android to PC Using Google Photos
Want a simple method for how to transfer photos from phone to computer that anyone can use with ease? Try sending photos using Google Photos.
All you need to do is upload your photos to the Google Photos app installed on your Android phone. Then, import them from the Google Photos web on your PC. Just make sure you're logged in with the same Google account on both platforms.
Facing any difficulty? Check out the below steps:
Step 1.
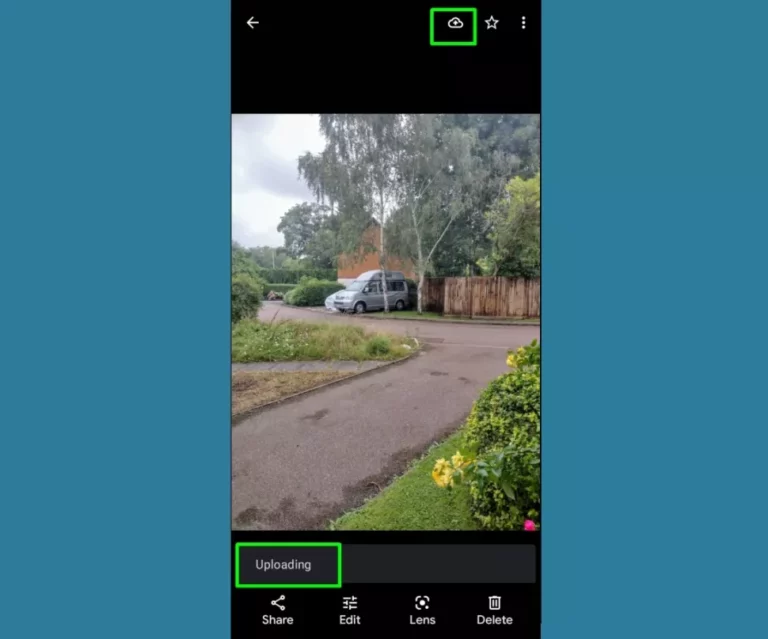
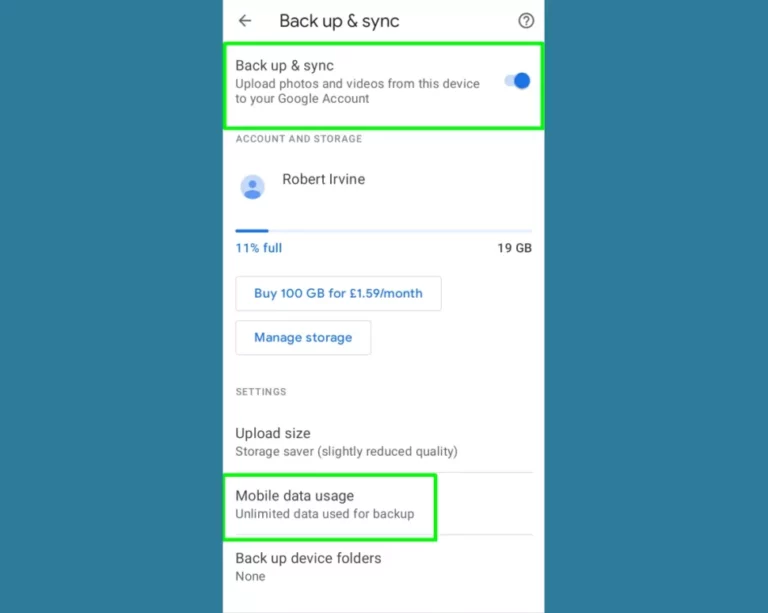
Launch Google Photos on your phone and upload the photos you want to transfer.
Step 2.
Tap the Upload icon on the app and wait until the process is finished.
Step 3.
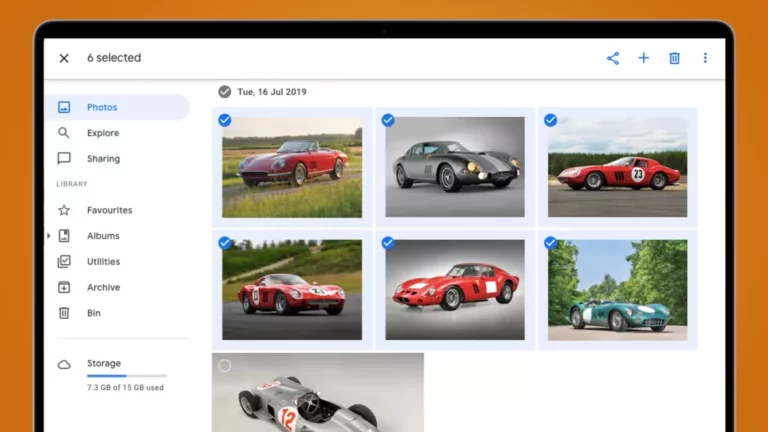
From your computer's web browser, navigate to go to photos.google.com and choose the photo/s you want to download.
Step 4.
Finally, hit the three dots icon and choose Download to save them on your PC.
3Transfer Photos Android Phone to Computer Using Bluetooth
If you're an Android user, you'd already know about Bluetooth technology. Even though it has fallen out of favor due to Wi-Fi, Bluetooth is still a handy choice to transfer data between Android and PC.
Before proceeding, remember that not all laptops or desktop computers have Bluetooth features. If your PC has this feature, here's how to transfer photos from Android to PC via Bluetooth:
Step 1.
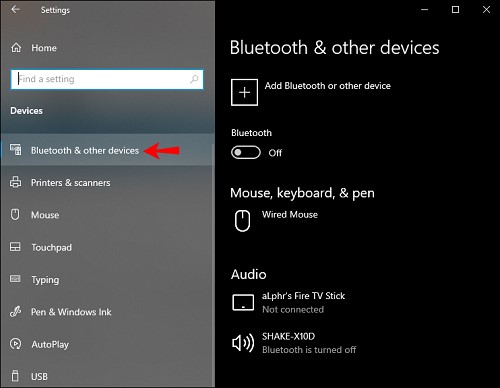
On your computer, go to Settings > Devices > Bluetooth & other devices, and enable Bluetooth.</
Step 2.
Enable Bluetooth on your Android phone and pair it with your PC to establish a wireless connection.
Step 3.
Once both devices are paired, select photos on your phone and tap the Share icon.
Step 4.
Now, tap the Bluetooth icon and accept the confirmation notification on your PC to begin the transfer.
4Transfer Photos Using Email
Email has long been a preferable medium to share files between a phone and a computer. Mobile users can also send photos via email and download them on the PC.
But note that this method is viable when you need to send a few photos as an email can hold data no larger than 25 MB.
The procedure is as simple as it can be. Just select the photos you want to transfer and attach them to an email. Open the email account on your PC and save them.
Part 3: Want the Most Efficient Method - Use AirDroid Personal
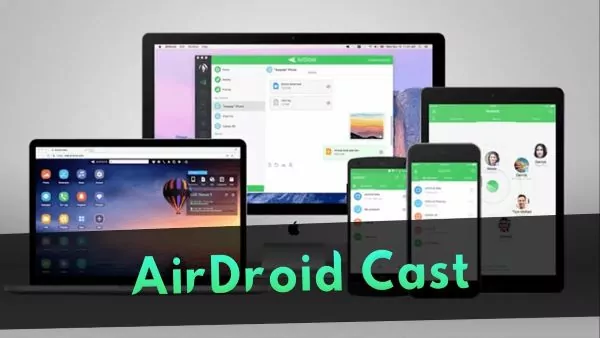
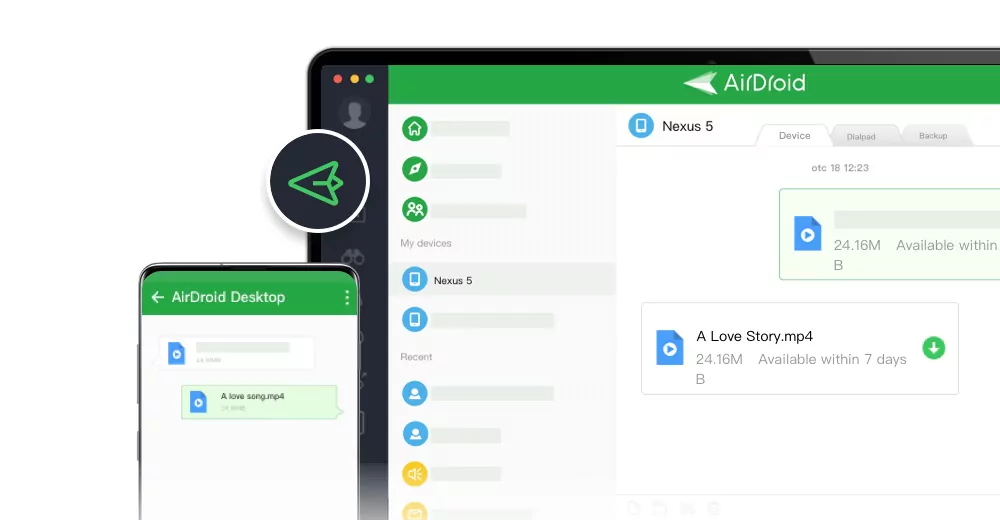
Want a tool that works with all Android devices and offers a quick procedure to share photos between your phone and PC? Look no further and get AirDroid Personal. It is a one-stop solution to transfer any data from your Android to your computer and vice versa. What's best is you can transfer files even when your phone is offline.
More strikingly, the program is compatible with all platforms including Mac, Linux, and iOS. Now, you can share your files between any two devices without any hassles. Not to mention, it boasts super-fast and lossless data transfer.
Here are some more advanced features you'd expect from its premium version:
Advanced Features
- The app allows cross-platform data transfer.
- Supports popular data types including photos, videos, documents, and so on.
- Lightning-fast transfer speed.
- Allows Android screen mirroring on PC.
- Manage Android SMS and calls from your desktop.
- Manage Android internal files more intuitively from the comfort of your computer.
- Use an Android camera remotely as a security device.
Using AirDroid Personal is as easy as it can get even for non-technical users. Here's how to transfer pictures from an Android phone to a computer:
Step 1.
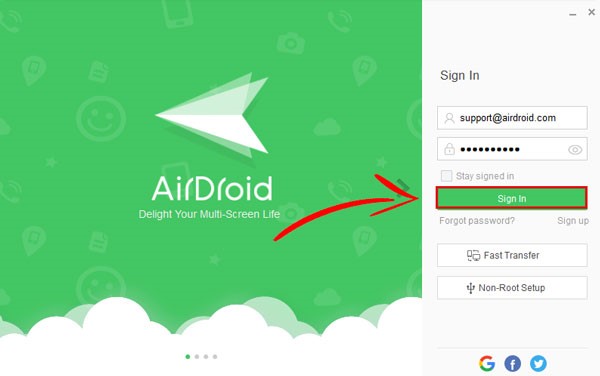
After installation, run both AirDroid Personal Desktop Client and AirDroid mobile app on the respective devices. Login with your AirDroid account on both devices.
Step 2.
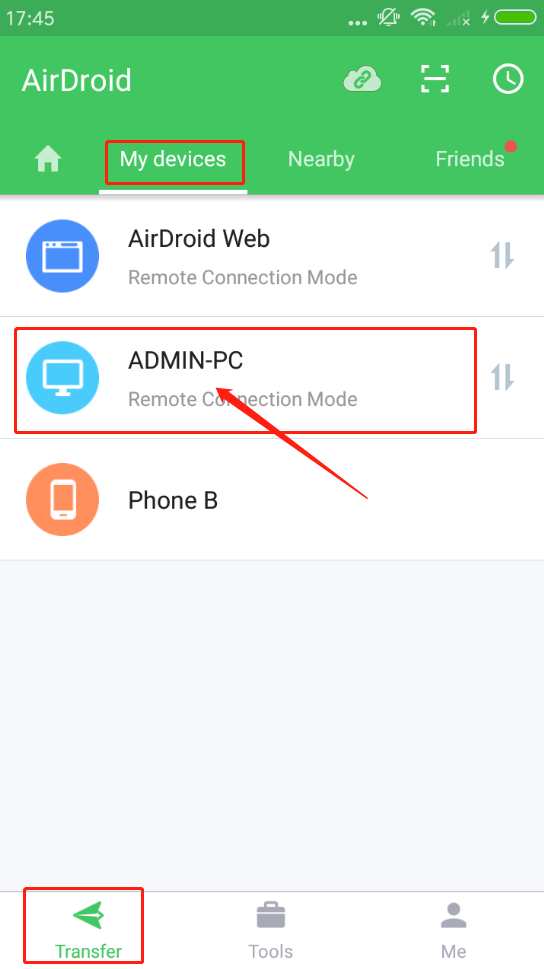
From the Personal app, tap your computer's name under My Devices.
Step 3.
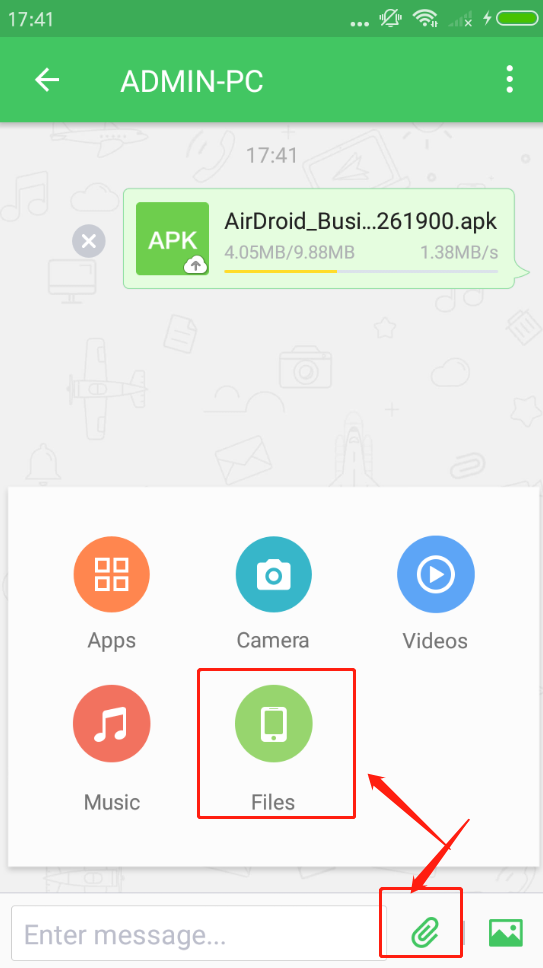
When the devices are connected remotely, hit File Transfer at the bottom and select the attachment icon > Files. Then, select the photos you want to transfer and tap Send.
Now that you have sent photos from Android to PC, the next step is to save them on your computer. Luckily, AirDroid automatically downloads the sent files in the destination folder. All you need to is choose the output folder and the program will do the rest.
To do that:
Step 1.
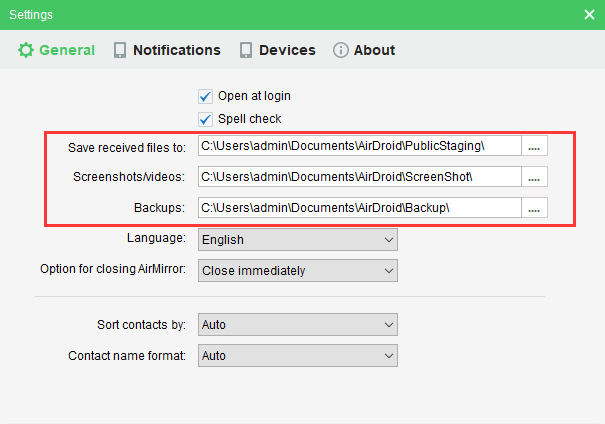
Open AirDroid Personal Desktop Client and head to its settings.
Step 2.
Here, browse a location for the "Save received files to" option. And you're good to go.
Final Remarks
And we are done. Now you know how to transfer photos from Android to computer via several easy ways. Choose the method or tool that fits your preferences.
But as far as our recommendation goes, use AirDroid Personal to get complete control over the transfer process. This app allows file transfer across multiple platforms including Mac, Windows, iOS, and Android – with an easy-to-use interface.



Leave a Reply.