[Step-by-step] How to Enable Remote Desktop in Group Policy
There is no denying that Remote Desktop Protocol (RDP) is an invaluable tool for personal and professional use. With it, you can easily connect to a computer remotely as if you were sitting right in front of it. A group policy is a feature of the Windows OS that enables administrators to manage the configuration of the system and its applications. Therefore, a group policy to enable Remote Desktop is a sure way to guarantee that all computers in a network can be accessed remotely.
This article provides you with step-by-step guide to enable and disable Remote Desktop using group policy.
Part 1. How to Enable Remote Desktop in Group Policy?
Creating a group policy to allow Remote Desktop is a rather straightforward process. You simply need to configure some settings within the Group Policy Management Console (GPMC).
Here is how to allow RDP in group policy:
- Step 1. Open Group Policy Management Console (GPMC)
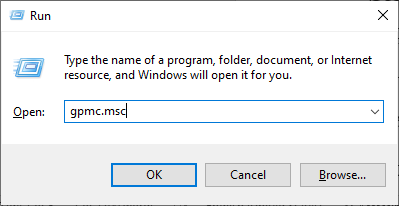
- Tap Win + R to open the Run dialog box and type gpmc.msc to open the Group Policy Management Console.
- Step 2.Create or Edit a Group Policy Object (GPO)
- In the GPMC, navigate to the domain where you want to apply the policy. You will find the Domains section on the sidebar.
Right-click the desired domain and click the Create a GPO in this domain, and Link it here... option. Name your new GPO and click OK to save it.
If you have selected an existing GPO, click the Edit option.
- Step 3.Enable Remote Desktop
- Go to Computer Configuration > Policies > Administrative Templates > Windows Components > Remote Desktop Services > Remote Desktop Session Host > Connections.
Locate and double-click on the policy setting named Allow users to connect remotely by using Remote Desktop Services.
On the popup window, select Enabled and click OK.
- Step 4.Allow Remote Desktop Through Windows Firewall
- Still in the Group Policy Management Editor, go to Computer Configuration > Policies > Administrative Templates > Network > Network Connections > Windows Defender Firewall > Domain Profile.
Double-click on the policy Windows Defender Firewall: Allow inbound Remote Desktop Exceptions.
On the popup window, set the policy to Enabled and click OK.
- Step 5. Enable Network Level Authentication
- Go to Computer Configuration > Policies > Administrative Templates > Windows Components > Remote Desktop Services > Remote Desktop Session Host > Security.
Double-click on the policy Require user authentication for remote connections by using Network Level Authentication.
On the popup window, set this policy to Enabled.
- Step 6. Allow Port 3389
- Go to Computer Configuration > Windows Settings > Security Settings > Windows Defender Firewall with Advanced Security.
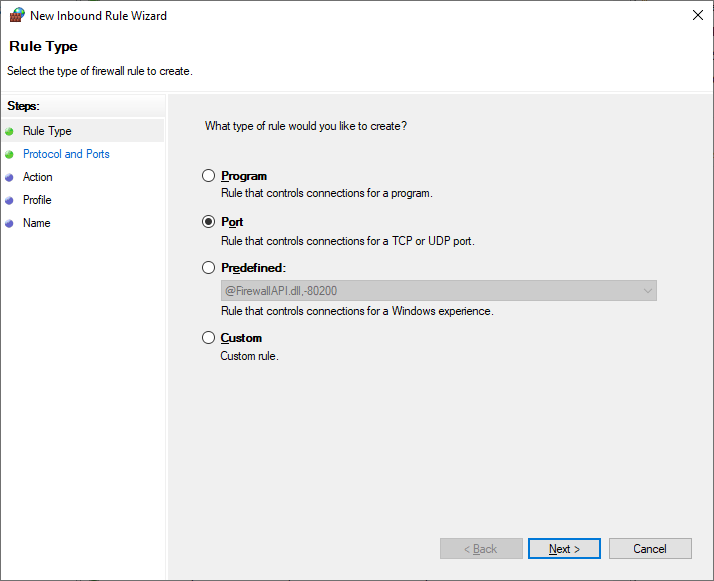
Right-click on Inbound Rules and click New Rule.
First, select Port and click Next.
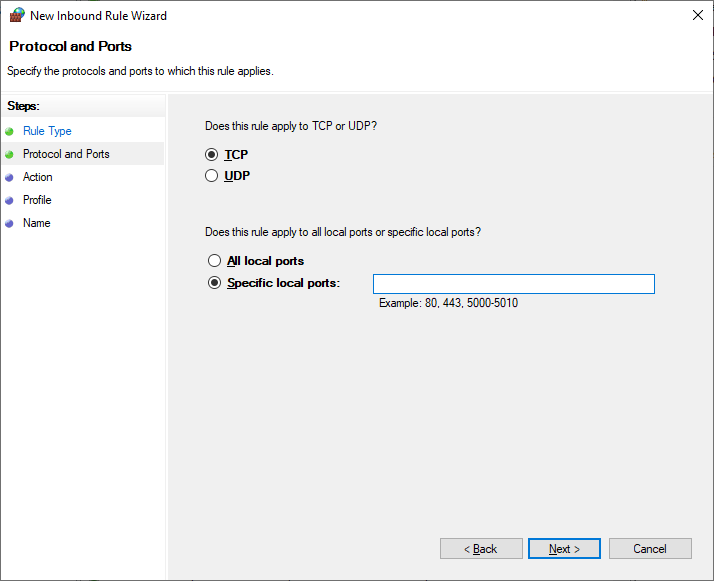
Select the TCP option, type 3389 in the Specific local ports field, and click Next.

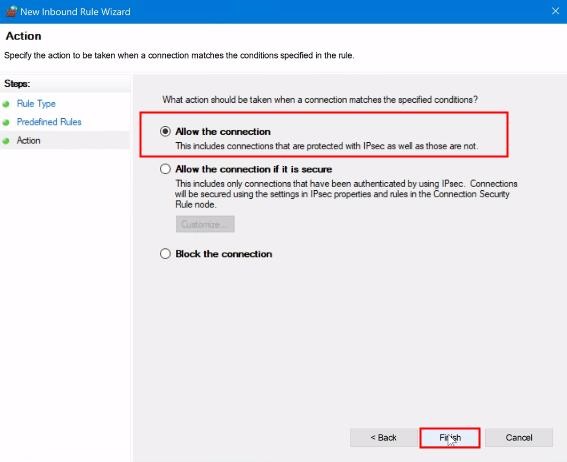
Select the Allow the connection option and click Next.

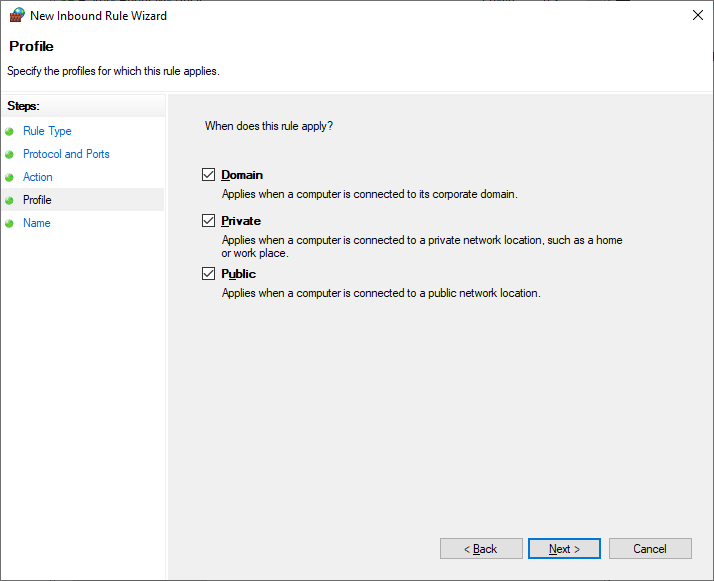
Select when the rule applies and click Next.

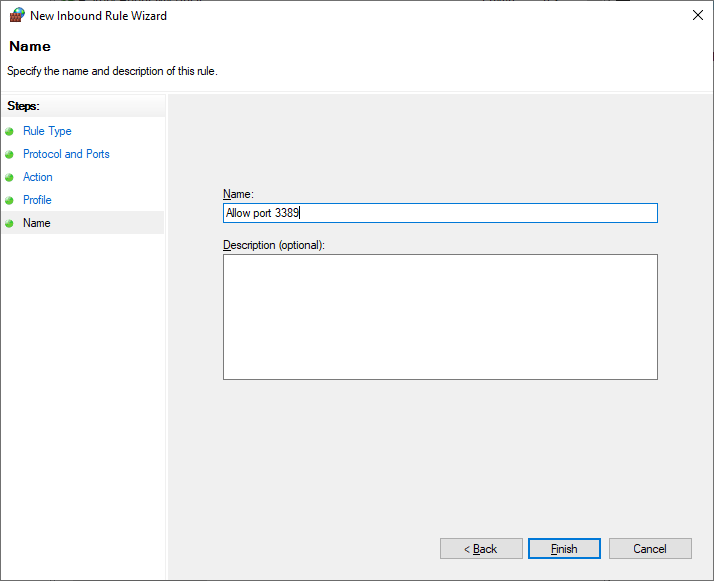
Finally, name your rule and click Finish to save it.

- Step 7. Force the Group Policy Update
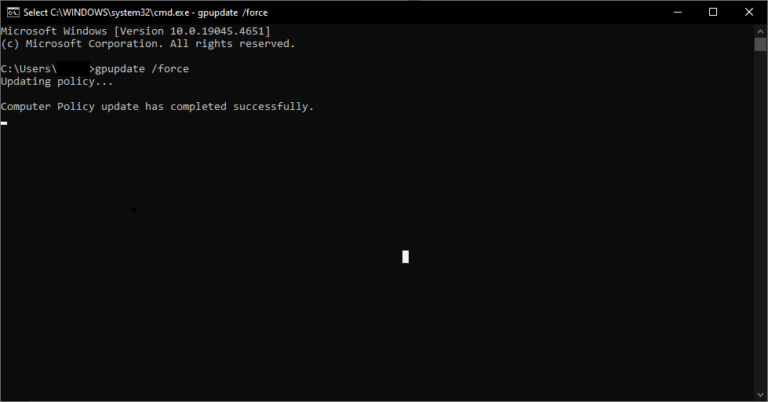
- To ensure that the new settings take effect immediately, you can force an update on the client computers. Open the Command Prompt on the client computer, type gpupdate /force, and tap Enter.
Part 2. How Do I Disable Remote Desktop with Group Policy?
Apart from a group policy to enable Remote Desktop, you also need to know how to disable it. Sometimes, this is a necessary process for security reasons or to comply with other organizational policies. Fortunately, disabling Remote Desktop is just as easy as creating group policy to allow Remote Desktop.
Here's how to do it:
- Step 1.Open Group Policy Management Console (GPMC)
- Tap Win + R, type gpmc.msc and click OK to open the Group Policy Management Console.
- Step 2.Edit the Relevant Group Policy Object (GPO)
- Navigate to the domain where the policy is enabled, right-click on it, and click Edit.
- Step 3.Disable Remote Desktop
- Go to Computer Configuration > Policies > Administrative Templates > Windows Components > Remote Desktop Services > Remote Desktop Session Host > Connections.
Double-click on the policy setting Allow users to connect remotely by using Remote Desktop Services.
Set the policy to Disabled and click OK.
- Step 4.Block Remote Desktop Through Windows Firewall
- Go to Computer Configuration > Policies > Administrative Templates > Network > Network Connections > Windows Defender Firewall > Domain Profile.
Locate and double-click the Windows Defender Firewall: Allow inbound Remote Desktop Exceptions policy.
Set the policy to Disabled and click OK.
- Step 5.Force the Group Policy Update
- Finally, force a group policy update on the client computers. Launch Command Prompt, type gpupdate /force, and press Enter. Wait until the group policy is updated.
Part 3. Best Remote Desktop Software - AirDroid Remote Support
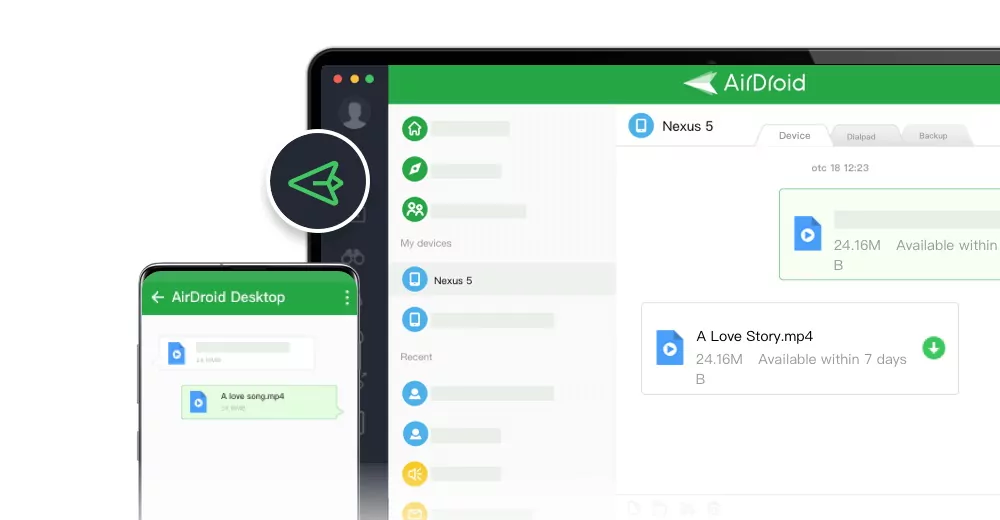
While the above methods provide you with a robust solution for Windows environments, it's not always easy to use group policy to enable Remote Desktop. Instead, you can find a flexible and feature-rich remote support tool that will fit seamlessly into your work routine. One such tool is AirDroid Remote Support, which offers a comprehensive suite of features designed for efficient remote assistance.
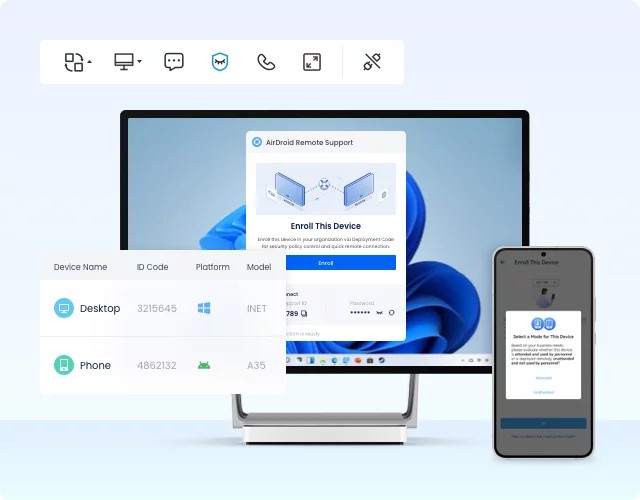
More specifically, the features that make AirDroid Remote Support your top choice are:
- Cross-Platform Compatibility – quickly install the lightweight tool on all of your devices, including Windows, macOS, Android, and iOS devices.
- User-Friendly Interface – the app’s interface is carefully crafted to make it easy for both IT professionals and end-users to initiate support sessions.
- High-Quality Voice Chat – with this tool, you can take advantage of the audio chat to communicate effectively during your session.
- Screen Sharing and Remote Control – gain full control of the remote device and take advantage of real-time screen sharing to make the most out of the remote session.
- Messaging and File Transfer – use the practical chat box to send messages to remote users, and even transfer files between devices.
Steps to Use AirDroid Remote Support
- Step 1.Install AirDroid Remote Support on the remote computer. Secondly, install AirDroid Business on the host computer.
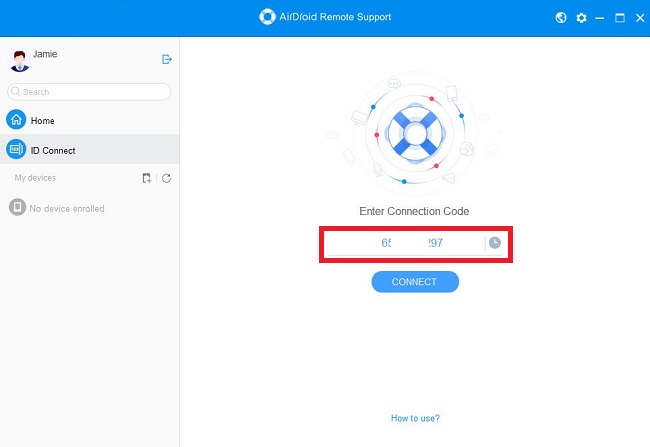
- Step 2.From the remote computer, launch the AirDroid Remote Support app and note the 9-digit unique ID.
- Step 3.From the host computer, launch the AirDroid Business app, paste the 9-digit ID, and click Connect.
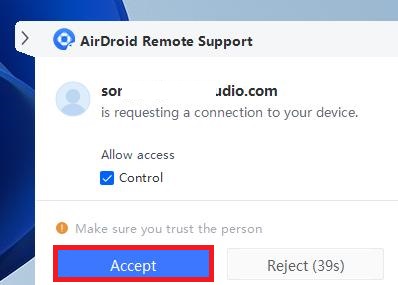
- Step 4.Click Accept from the pop-up that appears on the remote computer.
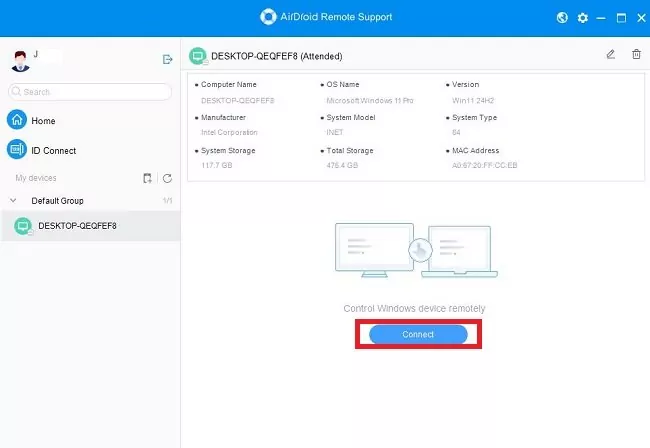
- Step 5.Select the remote computer from the left sidebar on the AirDroid Business app and click Connect.
The Bottom Line
Now you know how to create group policy to allow Remote Desktop, as well as how to disable Remote Desktop from group policy. However, for more advanced and flexible remote support, AirDroid Remote Support is the tool you should go for. With its rich feature set and user-friendly interface, it makes providing remote assistance easier than ever before. Don’t miss out – try AirDroid Remote Support today to gain an invaluable tool for your business.





Leave a Reply.